Mastering BC 2.0

If you like enormous books that are chockfull of information on a wide variety of technical topics related to Business Central, you must drop everything that you are doing, RIGHT NOW, and let me tell you all about this book. I’ll even give you a link where you can order it.

Book Review Number Twelve

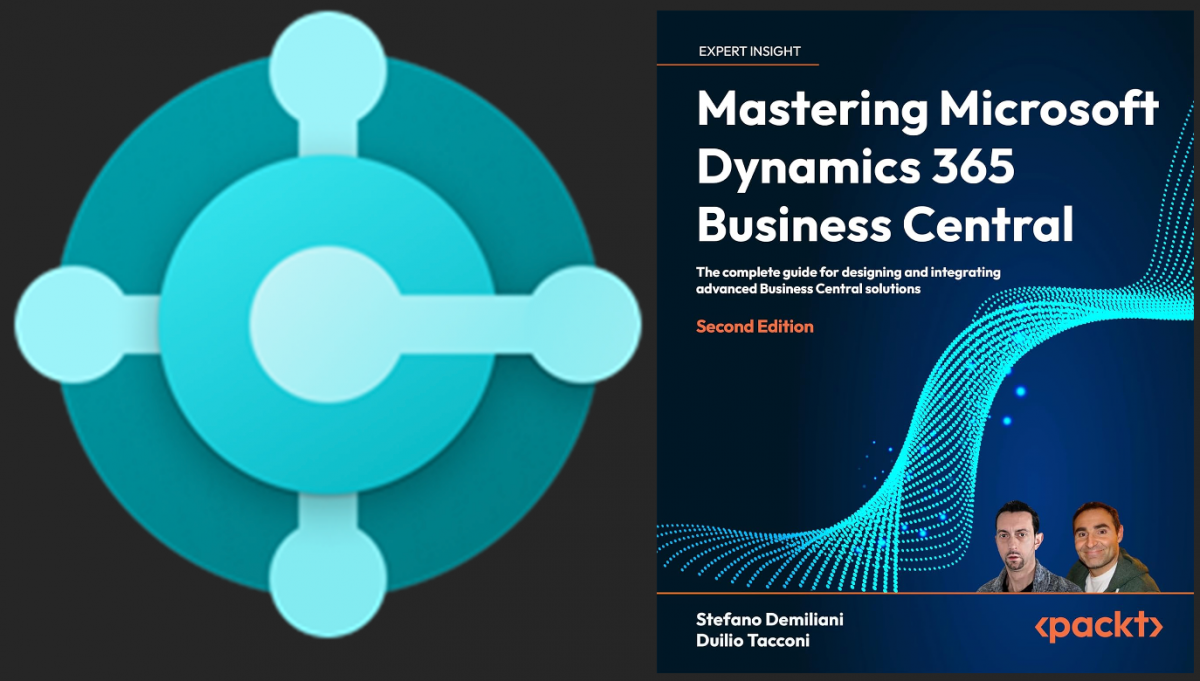
In early 2023 I got a message from Packt with a question whether I would like to help review another book. Over the years I have reviewed a bunch of books for Packt (this is number 12). It had been a while since the last one, so I was excited to put on my reviewer hat. This one was going to be a new and updated edition of a book called “Mastering Microsoft Dynamics 365 Business Central”. This is a very well-known reference book that is written by the dynamic Italian duo of Stefano Demiliani and Duilio Tacconi, both well known members of the BC community. Do yourself a favor and go follow their Twitter feeds (this one and this one), I’ll wait here.

The first edition came out in 2019, so it was about time that we got an updated version. For some reason I never got around to buying the first one, so I was fresh into this book without any preconceived notions about the content. Packt had sent me a table of content with a whopping 18 (yes, EIGHTEEN – and yes that is really spelled with just one ‘t’) chapters. VERY ambitious indeed…

It took most of 2023 to review these chapters. The sheer amount of content made it so that it regularly took entire weekends to process all the stuff and the code that was written. The last one was submitted in mid October, and the guys spent months processing all the feedback to finally release the book. They spared no effort to write the best book that they could, and it shows.

All the Things

You get 18 chapters on the most important technical topics in our BC world. I was going to write something specific about the content, but I’ll refer you to Stefano’s blog post to read more about that.

What I appreciate about this book is that each one of the chapters goes into enough meaningful detail that you feel you have a good grasp of the topic at hand. At the same time, you never get the feeling that you are taken too far into the matter. Wherever that is relevant, each chapter comes with a repository of sample code, to illustrate the topic. If you want you can write your own, and if you want to just follow along with the samples in the book, you can just open the code and poke at it.

Don’t let the sheer size of this book discourage you. Yes the book itself is MASSIVE, but the chapters individually are very manageable. There are other books that go into much more detail, but you will want to have this one to get yourself started on the topics. Another great feature is that you get access to all the book’s sample code in a GitHub repository.

My one ‘negative’ feedback was that in many instances the chapters contained the full object’s code. Sometimes you get pages of source code, which I personally think is a distraction. When I read a book like this, I have VSCode open with the sample code so I don’t need the full object in the book. I would have chosen to only include parts of the source code and highlight the important bits. When you only have the book in your hand that it can be useful to see the whole object though, so there’s an argument for whole objects anyway. Either way, you get lots of samples and that makes me very happy.

What if I already have the First Edition?

The thing is, I have not read the first edition, so I can’t speak for the content of that book. What I CAN tell you is that BC has evolved a TON since 2019, and all of the new capabilities get their due attention in this second edition. Things like Telemetry and AI were not yet available in those days, and even well-established topics have gotten a serious update, such as VSCode extensions and how DevOps can be done, and a ton of other stuff.

If you have the First Edition, it is time to retire it. This Second Edition deserves a spot on every technical BC person’s desk, or at least within reach.

Where can I Get it?

As per usual, two places where you can get it:

  • The Packt website – Packt’s online reader is really nice and searchable, I prefer it to Kindle, and there seems to be a discount on the eBook right now. Plus, being able to start reading right away is also nice, because Packt is not known for the best delivery times
  • Amazon – WAY better delivery times than Packt, so that’s where I would get it if I only wanted the paper version. The Kindle edition is more expensive than the eBook on Packt.

Mad respect and ALL the credit goes to Stefano and Duilio. In addition to having families and successful careers, they did a phenomenal job of writing this book for us. Writing this book was a monster of a task and they pulled it off. I am super proud to be a small part of making this the book that it is. Now click one of the two links and order the book!

NAV/BC Version Numbers

Many others have posted this information before. I’m just putting this on my own blog because I have noticed a decrease in the number of ‘old’ blogs out there and this is getting harder to find. I’m just securing the information so that I know I’ll have it for as long as I keep my blog up.

When I started as a Navision developer in March of 2000, version 2.5 had just come out. Most of the clients that I worked for were on 2.01. The version that is current today (v21 for the 2022 Wave 2 release, and v22 is just a couple of months away) directly derives from that version back in early 2000. There are earlier versions than that, and you can search for the history yourself, but I have never encountered anything older than 2.01. I just wanted to have a handy list as a quick reference.

Here They Are

  • Navision in various incarnations (Financials, Attain, Microsoft Business Solutions) 1, 1.1, 1.2, 1.3, 2, 2.01, 2.5, 2.6 (also versions with manufacturing and another with Advanced Distribution, as well as specialty versions for the first NAS 2.65 a, b, c, d, and e), 3.00, 3.01, 3.10, 3.60, 3.70, 4.0, 4.0 SP1-SP2-SP3, 5.0
  • Dynamics NAV 2009 is version 6 – also had SP1 and then R2
  • Dynamics NAV 2013 is number 7 – also had R2
  • Then there were NAV 2015 (8), 2016 (9), 2017 (10), and 2018 (11)
  • Version 12 was the first BC version, AKA Business Central 2018. For a while there (at least through BC14) was a bit of a split personality with the splash screen saying “Microsoft Dynamics NAV Connected to Dynamics 365 Business Central”, a very catchy and easy-to-remember 24-syllable name
  • From then on there is a release every 6 months:
    • 13 – October 2018
    • 14 – April 2019 (this was the last version with C/SIDE)
    • 15 – BC 2019 wave 2
    • 16 – BC 2020 wave 1
    • 17 – BC 2020 wave 2
    • 18 – BC 2021 wave 1
    • 19 – BC 2021 wave 2
    • 20 – BC 2022 wave 1
    • 21 – BC 2022 wave 2
    • and so on and so forth

update 2023-02-14: added some missing versions

Save Report Filters

Going back into the stone age, report objects have always remembered the filter values for the next time that you run the report. What I never noticed was a capability to actually save filter values (yes I now realize that it’s been in there for years now). It’s similar to saving a view of a list page, but for reports. It works a little hinky but let me try and explain.

What I Am Talking About

You may have noticed it in some (but not all) reports, processing-only or actual printed ones. Right at the top of the request page, you see a dropdown box with the words “Last used options and filters”. Click the dropdown arrow and that should show you an option to “Select from full list”.

This opens the “Select – Report Settings” page. The page actually has nothing to do with any settings, but it does show you a list of saved values for the options and filters of the report object. In my mind I am calling it a ‘view’.

I just created a bogus empty report just to show you the options, so ignore the content of the report itself. The interesting part of this page is what you can do. When you click the ellipses, you get a number of options.

  • Delete – obviously to delete the currently selected option
  • New – creates a new record, where you can give the saved value a label and you can define whether this view is for all users or not. Assigning the view to a specific user is done on the list page itself
  • Copy – creates a new record with the same values as the one that’s called “Last used options and filters”
  • Edit – This only works on custom views, and it runs the report’s request page where you can enter the options and filter values for the current view

You can assign the view to a specific user or share it with all users. If this capability is enabled for a report, you should be able to pick from the list of views right from the request page.

How To Enable This

You need to do two things to enable this capability.

  • First, you set the ‘SaveValues’ property on the report’s requestpage. If the report doesn’t have a requestpage, you can add one with just the property and no controls
  • Second, you need to run the report. When you first deploy the report with SaveValues turned on, it does not yet have a view saved. Run the report with any filter/option value and it should create this record for you
requestpage
{
    SaveValues = true;
}

A Little Hinky

To me it feels a little unfinished, like it was rushed into the system. To begin, it’s inconsistent in labeling. On the requestpage it is called “Use default values from” which is incorrect. This is about ‘saved’ values, not ‘default’ values. Then when you open the full list, it is labeled “Select – Report Settings” which again doesn’t feel right. I don’t consider filter values a ‘setting’. Then when you click ‘New’ it opens a screen that is captioned “Edit – Pick Report”… I mean come on… Finally, having to run the report in order to even get the dropdown is not very user friendly. When I first tested this I thought I had done something wrong because the dropdown would not show.

Another big drawback is that the SaveValues property is not available in Report Extensions. You’ll have to copy the standard object in order to provide the capability.

Regardless of its hinkiness and shortcomings, the feature itself is great, especially when you have periodic activities to run for different sets of filters. it’s really nice to have the ability to preconfigure sets of option/filter values. It has the potential to increase productivity and eliminate typos in entering filters. In my opinion, this feature should be enabled by default.

Obsolete But Not Gone

This post was born out of a bit of an embarrassing situation, in which I had to obsolete some fields from an AppSource app. Just a quick one to let you know what the official process is, and also that you don’t have to wait for the next major version of BC to fully obsolete a field.

The ‘Situation’

This app has table extensions for the Sales Line table and the posted sales line tables (invoice and credit memo). Not until their first live implementation did we find out that the field numbers in the credit memo line table were not aligned, so at that point BC will yell at you that field types are not compatible. Oops….

For those that don’t understand, let me explain. Field values in the Sales Line table are copied to their posted counterparts by a command called ‘TransferFields’. This command basically copies all the field values from the source table into the target table. Couple things to note: the fields must have the same field numbers, and they must have the same data types. In our case, we had fields 1 and 2 in the Sales Line table, and their corresponding fields in the posted credit memo line had field numbers 2 and 3. The posting process tried to put a number 2 value into field number 1, with the predictable result that there was a data type mismatch.

Why is this a problem? Can’t you just change the field number? Well no, because once an app is published on AppSource, you are not allowed to make any ‘breaking changes’, and renumbering a field is considered a breaking change. Doesn’t matter how I personally feel about that (I don’t agree that field numbers are breaking) and so we did not have any other choice but to use the obsoletion process.

As a side note – yes this exposed a serious issue in our process. Posting a credit memo had clearly not been tested, and matching field numbers is something that a BC developer with my experience should never have a problem with. To my client’s credit: no fingers were pointed, we addressed the issue, and we shared the cost of fixing it.

Obsoleting a Field

Alright, so the official process of obsoleting a field is described in the ‘deprecation guidelines‘. Skip the preprocessing piece if you have not seen that before, and focus on the steps in making code obsolete. There are plenty of blog posts that explain the process itself, so I will not go into any detail.

My main concern was how fast can we get this into AppSource. The process to make a field obsolete has two stages:

  • First, the ObsoleteState of the field is set to ‘Pending’.
    • This means that the field has been marked, but it can still be used in the app
    • The purpose of this stage is to flag the code to any party that has an extension of the code, so that they can take steps to address the change
    • All references to the field will be shown in the VSCode problems window with a warning. There is a reason and a tag property that is used to define which in BC version the change will become permanent
  • Second, the ObsoleteState of the field is set to ‘Removed’.
    • In this state, the field still exists but it cannot be used any longer
    • All references to the field will show up as errors in the problems list

There is a perfectly valid reason why there are two steps. My concern was how long it would take us to get the fields to be removed. The documentation does not address the required AppSource timeline, and I could not find any definite answers in Yammer. The only timeline reference that I could find in any Microsoft documentation was that code must be in ‘Pending’ state for one entire major version. This issue came up in early October, days after 2022 wave 2 was released. If this was true, we would have to wait until 2023 wave 1 (April next year!!) to get the fields obsoleted.

What We Did

Some partners assured me that there is no mandatory wait time for a whole major cycle. The intention of that timeline is not to limit partners but a practice that Microsoft uses. This is to make sure that the partners always have at least one full release cycle to address any compatibility issues due to obsolete code in the base app.

So, with that in mind we went to work. What saved us is that this particular app only had one implementation live, so all we had to do is make sure that they upgrade the app to the ‘Pending’ version as soon as humanly possible. Depending on the number of live implementations you have, this could take longer. I actually don’t even know if there is a dashboard where you can see the live versions that are in use.

I have to say that I was very impressed with how smooth the process of pushing a new version of an app into AppSource is now. After properly testing the change, we pushed the ‘Pending’ app to AppSource, and that was done and ready to publish within a day. The end user then upgraded the app, and we pushed the ‘Removed’ app to AppSource right away. We were able to address the issue within days, and the client lived happily ever after.

Repair Companion Tables

One of my clients has been seeing these weird data issues when migrating databases to the cloud. The most important purpose of this post is to point out a handy data tool that is buried deep in the application, read on to learn what I am talking about.

The problems that my client is experiencing mostly have to do with various ways in which they get data from OnPrem to the cloud. One way is to use the cloud migration tools, another is configuration packages. In addition to using different tools, it feels like there may be some issues with the BC platform’s capability to properly manage data in table extensions. I’ll tell you why I think that.

Missing Data

The first indication was a problem where invoices were migrated into the cloud. The migration process seems to have completed, and the posted invoice list shows a list of invoices. The weird part is that when you try to open an invoice, it shows an empty invoice page. Click ‘View Table’ from the page inspector, and you get nothing, a list of zero records even though the posted invoice list shows the records. Go to the admin center to look at the capacity, it tells us there are like 1154 invoices but when you drill down into the number you get another empty list.

This feels very familiar to me, very much like when a lot of companies tried to migrate straight into SQL Server and we would see null field values. As we all know, BC can’t handle null values. Instead of getting an error saying ‘there are null values!! I don’t know what to do!!’ you get weird behavior like empty lists for tables that you know have plenty of records.

Solving The Problem

With the explosion of moving functionality into separate apps, I had a feeling that the problem had something to do with table extensions (which as you know have added fields in what is called ‘Companion Tables’). I had posted the question on Twitter and there were suggestions to uninstall and re-install apps. This worked sometimes but not all the time.

The original Tweet asking for help on this issue

What it feels like to me is that either there are null values in records, or maybe records are missing in companion tables altogether. We don’t have access to Azure SQL so there is no way for me to actually prove that there is an issue with table extensions. SOMETHING is wrong here though, and for the longest time the only way that I thought we could fix it was to uninstall/re-install apps until the issue was fixed. The reason why this works is that each time you install an app, it will update the schema and make sure that data integrity remains intact. In other words, it will make sure that all records in the main tables have corresponding records in all companion tables.

And then I became aware of a VERY handy little tool. This tool is not available when you are working in local containers, but when you are in a cloud tenant, you will have access to it. I’m talking about the “Repair Companion Table Records” process in the “Cloud Migration Management” page.

The tool will go through all tables that have table extensions, and make sure that each record in extended tables has a corresponding record in each companion table. I still can’t prove my theory but I do know that running this process fixed the problem for my client.

Create JSON in AL

Last year I developed an integration to an external REST API from Business Central. One of the things that I had to learn is how to deal with JSON. We now have a bunch of different JSON data types, and if you’re just getting into them, they are hard to keep apart. With this post, I’ll try to explain as easy as I can make it, how to create a JSON object in AL.

JSON Basics

First, of course, the basics.

  • JSON is short for ‘JavaScript Object Notation’, follow this link to read the actual standards but if you’re new to this don’t though, it will only confuse you
  • It’s kind of like XML in concept but much easier to read. No attributes, no formatting rules, just a collection of key/value pairs
  • The equivalent of an ‘XML document’ is called a ‘JSON Object’. The start and end of these JSON objects are marked by curly braces (these {}).
  • Keys and values are always between double quotes (unless they are in non-text data types, but you can always put values in double quotes), separated by a colon. Multiple key/value pairs are separated by commas. This is a very simple JSON object with some key/value pairs:
{
    "A Key": "Example One",
    "Another Key": "Another Value",
    "Number Value": 42,
    "Boolean Value": false
}
  • Nesting is done by adding a new JSON object as a value, like this:
{
    "A Key": "Example Two",
    "Nested thing": {
        "First nested Key": "nested value",
        "Second nested key": "some other value"
    }
}
  • A list of JSON objects is called a ‘JSON Array’. The only restriction here is that each of the objects in an array must be structured the same, otherwise it would not be an array. The start and end of a JSON array is marked by square brackets. Each object has its own start/end curlies, and they are separated by commas. Here’s a simple example:
{
    "A Key": "Example Three",
    "List of Things": [
        {
            "name": "thing 1",
            "age": 10
        },
        {
            "name": "thing 2",
            "age": 12
        }
    ]
}

Note that the objects inside the array are identical in structure. This is really it, you should now be able to decipher any JSON response from any web service.

JSON Data Types in AL

In AL, there are 4 different JSON data types. All of these data types are .NET types that are wrapped in AL data types. You don’t have to worry about constructing these variables, they take care of themselves. All you have to do is make sure that you start with a fresh one, so pay attention to the scope of your variables. If you are not sure about that, use the Clear keyword to empty it out.

  • JsonObject – this data type represents an actual JSON object. It has properties and methods, and you use those to build the object as shown in the code examples below
  • JsonArray – this data type is also an object with properties and methods, and it contains the stuff that is between the square brackets
  • JsonValue – this represents a single value of a simple data type like a Text, an Integer, or a Boolean
  • JsonToken – in the JSON world, the ‘Token’ is similar to a Variant, and it can be either one of the other three Json data types. If you are not sure about the content of a JSON element, you can always use a Token as a data type

Show Me The Code!

When I started this section I was going down a rabbit hole of long sentences and complicated explanations. As I was reading what I wrote I realized that describing these things actually was not making any sense at all. Let me just give you the code, and if you have any questions about this please leave a comment below.

Each example refers to the JSON examples in the ‘JSON Basics’ section above.

Example One

The first example is very straight forward. This object only has simple key/value pairs, so we can simply add those to the object, like this:

    procedure ExampleOne()
    var
        MyJobject: JsonObject;
    begin
        MyJobject.Add('A Key', 'Example One');
        MyJobject.Add('Another Key', 'Another Value');
        MyJobject.Add('Number Value', 42);
        MyJobject.Add('Boolean Value', false);
    end;
Example Two

The second example has another JSON object as one of its values. The ‘Add’ method of the JsonObject data type takes a string as the Key name, and a JsonToken as the value parameter. In the first sample those were simple datatypes, and for this second sample we’re going to create another object to use as the value parameter, like this:

    procedure ExampleTwo()
    var
        MyJobject: JsonObject;
        NestedJObject: JsonObject;
    begin
        MyJobject.Add('A Key', 'Example Two');

        NestedJObject.Add('First Nested Key', 'nested value');
        NestedJObject.Add('Second Nested Key', 'some other value');
        MyJobject.Add('Nested thing', NestedJObject);
    end;
Example Three

The final example includes an array of objects, so we’ll build those one step at a time. Everything just coded in there, I hope you see how the array objects should be refactored into a re-usable function.

    procedure ExampleThree()
    var
        MyJobject: JsonObject;
        ThingJObject: JsonObject;
        MyJArray: JsonArray;
    begin
        MyJobject.Add('A Key', 'Example Three');

        Clear(ThingJObject);
        ThingJObject.Add('name', 'thing 1');
        ThingJObject.Add('age', 10);
        MyJArray.Add(ThingJObject);

        Clear(ThingJObject);
        ThingJObject.Add('name', 'thing 2');
        ThingJObject.Add('age', 12);
        MyJArray.Add(ThingJObject);

        MyJobject.Add('List of Things', MyJArray);
    end;
What about JsonToken?

We did not use a variable of type JsonToken directly, because when we are creating a JSON Object we already know what we have. Indirectly though, we definitely ARE using a Token. The ‘Add’ method of both the JsonObject and the JsonArray data types use a Token as the value parameter. Since the Token can be any simple type or any other Json type, you can simply throw any of those in and it knows what to do with it.

The JsonToken type will come in very useful when you start processing incoming JSON objects, and you need to make sure you correctly convert values into compatile data types in AL.

What’s Next?

These are just some very simple examples of how to build a JSON object, but this is really all the logic you’ll ever need to create your own. The JsonObject will take care of the curlies and the commas, the JsonArray will take care of the square brackets and all the other stuff. The only slightly complex thing you’ll ever need to do beyond this is to now take the JsonObject and set it as the body of an HttpRequest.

Let me know in the comments if this is helpful. There are other super useful posts about this topic, but I wanted to explain this in my own words. I will also write one how to read an incoming JSON object, and at some point I’ll share some helper logic that I’ve created to help take care of conversions and such.

Import Media Files for SaaS

One of the standard ‘Problems’ when you’re in an AL workspace in VSCode is a warning that you are no longer allowed to use BLOB as a datatype for images. This has been at the bottom of my priorities list until I had a request to create a new image for a standard field. With this post I’ll show you how easy it is.

Media Field

The first element that you need is a field in the table. Instead of a BLOB field with subtype Bitmap, you now need a field of type ‘Media’. There is also a data type called ‘MediaSet’ but that’s not what we are going to use. Go to Docs to read about the difference between Media and MediaSets. The field is not editable directly because we will be importing the image through a function.

In addition to the field itself, you need a function to import an image file into the field. In the object below I have a simple table called ‘Book’ with a number, a title and a cover. We use the ImportCover function to do the import, and implement that as an internal procedure, so it can only be used internal to the app. You can of course set the scope as you see fit.

table 50100 BookDnStr
{
    Caption = 'Book';
    DataClassification = CustomerContent;

    fields
    {
        field(10; "No."; Code[20])
        {
            Caption = 'No.';
            DataClassification = CustomerContent;
        }
        field(20; "Title"; Text[100])
        {
            Caption = 'Title';
            DataClassification = CustomerContent;
        }
        field(30; Cover; Media)
        {
            Caption = 'Cover';
            Editable = false;
        }
    }

    keys
    {
        key(PK; "No.")
        {
            Clustered = true;
        }
    }

    internal procedure ImportCover()
    var
        CoverInStream: InStream;
        FileName: Text;
        ReplaceCoverQst: Label 'The existing Cover will be replaced. Do you want to continue?';
    begin
        Rec.TestField("No.");
        if Rec.Cover.HasValue then
            if not Confirm(ReplaceCoverQst, true) then exit;
        if UploadIntoStream('Import', '', 'All Files (*.*)|*.*', FileName, CoverInStream) then begin
            Rec.Cover.ImportStream(CoverInStream, FileName);
            Rec.Modify(true);
        end;
    end;
}

Factbox for the image

Similar to how Item images have been implemented, you can create a factbox to show the book cover and add that to the Book Card. Using a factbox also makes it easy to keep the related actions close to the control.

page 50100 BookCoverDnStr
{
    Caption = 'Book Cover';
    DeleteAllowed = false;
    InsertAllowed = false;
    LinksAllowed = false;
    PageType = CardPart;
    SourceTable = BookDnStr;

    layout
    {
        area(content)
        {
            field(Cover; Rec.Cover)
            {
                ApplicationArea = All;
                ShowCaption = false;
                ToolTip = 'Specifies the cover art for the current book';
            }
        }
    }
    actions
    {
        area(processing)
        {
            action(ImportCoverDnStr)
            {
                ApplicationArea = All;
                Caption = 'Import';
                Image = Import;
                ToolTip = 'Import a picture file for the Book''s cover art.';

                trigger OnAction()
                begin
                    Rec.ImportCover();
                end;
            }
            action(DeleteCoverDnStr)
            {
                ApplicationArea = All;
                Caption = 'Delete';
                Enabled = DeleteEnabled;
                Image = Delete;
                ToolTip = 'Delete the cover.';

                trigger OnAction()
                begin
                    if not Confirm(DeleteImageQst) then
                        exit;
                    Clear(Rec.Cover);
                    Rec.Modify(true);
                end;
            }
        }
    }
    trigger OnAfterGetCurrRecord()
    begin
        SetEditableOnPictureActions();
    end;

    var
        DeleteImageQst: Label 'Are you sure you want to delete the cover art?';
        DeleteEnabled: Boolean;

    local procedure SetEditableOnPictureActions()
    begin
        DeleteEnabled := Rec.Cover.HasValue;
    end;
}

Add to the Page

All that is left is to add the factbox to the page where you have the import action. In this case I have a very simple Card page for the book, and the factbox is show to the side.

page 50101 BookCardDnStr
{
    Caption = 'Book Card';
    PageType = Card;
    ApplicationArea = All;
    UsageCategory = Administration;
    SourceTable = BookDnStr;

    layout
    {
        area(Content)
        {
            group(General)
            {
                field("No."; Rec."No.")
                {
                    ToolTip = 'Specifies the value of the No. field.';
                    ApplicationArea = All;
                }
                field(Title; Rec.Title)
                {
                    ToolTip = 'Specifies the value of the Title field.';
                    ApplicationArea = All;
                }
            }
        }
        area(FactBoxes)
        {
            part(BookCover; BookCoverDnStr)
            {
                ApplicationArea = All;
                SubPageLink = "No." = field("No.");
            }
        }
    }
    actions
    {
        area(Processing)
        {
            group(Book)
            {
                action(ImportCover)
                {
                    Caption = 'Import Cover Art';
                    ApplicationArea = All;
                    ToolTip = 'Executes the Import Cover action';
                    Image = Import;
                    Promoted = true;
                    PromotedCategory = Process;
                    PromotedOnly = true;

                    trigger OnAction()
                    begin
                        Rec.ImportCover();
                    end;
                }
            }
        }
    }
}

This was a fun one to figure out. Let me know in the comments if it was useful to you

Commitment Issues

So you’re evolving your source control practice. You have created a ‘dev’ branch to keep work in progress away from the ‘main’ branch, and maybe you are even using feature branches or branches per developer. As you are putting in place branch policies to prevent just anybody from committing changes, you notice a pattern of commits being created just by merging a change into ‘main’. In this post I will show you how to limit the number of commits.

The Setup

I have a simple project in Azure DevOps, with a repo that has a default branch called ‘main’ and a ‘dev’ branch. The main branch requires a reviewer, which in Azure DevOps means that changes can only be made through pull requests. I’ve committed a couple of changes in dev and I have created a pull request to move that change into the main branch to be released. The PR has been approved and I have clicked the ‘Complete’ button on the PR. The Azure DevOps default Merge Type is set to ‘Merge’ and all looks well, so then I click the ‘Complete Merge’ button.

The Issue

When the PR completes, you go back to the Branches view in Azure DevOps, and you notice that the dev branch is 1 commit behind on Main….

Wait, what? Didn’t I just merge 2 commits from dev into Main? The purpose of the PR was to synchronize the branches, but it appears that dev now a commit behind main. The Merge Type of ‘Merge’ created its own commit in the target branch, main in this case. When you go back to VSCode and merge main back into dev, you would notice that the source files themselves have not changed, even though Git has created two extra commits just from the Merge actions. You see, any time that you do a Merge in Git, it will generate a new commit.

If you were to do a file compare between the two branches, there would be no differences in the source files. The not so good part of using the Merge Type ‘Merge’ is that you will have to refresh your local main branch and merge that into your dev branch BEFORE you can continue developing. In itself maybe this works for many people but I prefer it if I can push out my dev work and continue developing without having to worry about being in synch with main.

A Better Way

There is another (I would argue a ‘better’) way to complete PRs. Another setup: I’ve updated my local main and merged that into my local dev branch; I have made another code change, which I have pushed that to the remote from my VSCode. The Branches view in Azure DevOps now shows dev is one commit ahead of main.

This time when you complete the PR, you select ‘Rebase and fast-forward’ as the Merge Type.

Because we are not merging, Git will not create a new commit. The result of this Merge Type is that the branches are in synch after completing the PR. There is no need for me to go back to VSCode and update my main branch.

So What is the Difference?

I’ll be totally honest here and tell you that I don’t really understand the difference between ‘Merge’ and ‘Rebase’. Something about where in the first the differences are actually merged and the changes are preserved in a new commit, and in the second the branch is rebased and the incoming changes are applied to that new base. I am sure that there is a distinct difference, and that this has an impact on the way you manage branches. I’ve looked for but could not find any posts that clearly explain the two with proper examples. I’m still looking, and I still want to know, but I have other more important things to worry about right now. Maybe a good topic to write about in the future :).

For practical purposes though, for the type of projects that I am involved in, I prefer the Rebase option. Personally, I prefer the branches to be synchronized when a PR is completed. Having to go back and pull the merge commit back into my local dev branch feels like a redundant step.

Use SystemId

If you’re like me, and you use the ‘Page Inspector’ a lot, you have undoubtedly scrolled all the way down, and noticed this group of fields at the bottom. One of those fields is called ‘SystemId’. Today’s post describes some of the important things that you need to know about this field.

The Basics

Toward the end of the ‘NAV’ era, you may have noticed a field called ‘id’ in a lot of tables. This field was meant to have a single-field unique attribute for each record in the database. The original purpose was to provide a more industry standard way to get to records from a webservice, and it was implemented as an actual field of each table for which such functionality was provided.

In BC, the ‘id’ field has been obsoleted and replaced by a new system field called “$systemId”, an attribute that is assigned at the system level. The logic that assigns the values is not accessible to us, it all happens behind the scenes. You can read more about the field itself in Docs.

Some important things to remember:

  • Each SystemId value is unique, you will never see any SystemId value repeat across any table. You could cheat the system and manually assign a value to the field, but if you let BC assign its value it will always be unique
  • Its value cannot be renamed. Unlike PK fields in the database, the SystemId is not editable

So How Does It Work?

You will not see the SystemId as a field anywhere. Drill down into a table’s design and it is not there as a field. You can see the value when using the Page Inspector, but none of the pages have the field visible to the user. That would be pointless, because the SystemId does not have a functional purpose. It’s just a random GUID value that holds no meaning. However, EVERY table has a SystemId field, and since its value is always unique, you could theoretically use the field as its primary key.

You can leave the field alone altogether and just continue using the regular PK fields, and BC will automatically take care of the SystemId. If you are just using or developing ‘normal’ functionality, you will probably never even be aware of the presence of the SystemId.

One really handy thing though is that this is a single field unique value! You could capture a tablerelationship in a single field regardless of the target table’s primary key! You could link to the Sales Line’s SystemId field with a single field foreign key, and not have to worry about document type or line number. All you need to do is store the SystemId as a GUID field, with a tablerelationship to the target table’s SystemId field.

To retrieve a record using its SystemId, you use the GetBySystemId method instead of the regular Get method that you are used to.

How Is It Used?

The main purpose of the SystemId is to facilitate the API. The BC API endpoints are formatted in such a way that you specify the systemId as the unique value for the record that you want to retrieve. Yes you can still do a filter on the PK fields, but the standard way to get a particular record from an API endpoint is to provide its SystemId field value. When posting a new record, the response will return the new record’s SystemId.

You can look at a bunch of tables that are part of the API and see that a lot of tables have new fields for these SystemId fields. Take for instance the Customer table. You can see a bunch of new fields like “Currency Id” and “Payment Terms Id” with logic in OnValidate to update the ‘normal’ fields that are all still there. The new SystemId fields do not replace the existing related fields, they live side by side.

Still Confused

Yes it is still confusing, well maybe ‘cumbersome’ is a better word. The mechanism is fairly straightforward , but it has not made our job easier. Not every tablerelationship has been updated with the SystemId, and where you do see those ‘new’ ones, there is a double field relationship that has to be maintained with validation code. Especially when you need to expand standard APIs, you will have to create those additional SystemId fields on top of existing foreign key fields to ensure data integrity.

Containers And Bacpacs

A while ago an ISV client of mine was working on getting their app into the Embed program. Part of this process was to upload a bacpac with certain characteristics. The characteristics themselves are not relevant for this post but as I was helping them, but I thought I’d write this quick post to share how you can extract your bacpac files from a container, and how to use those bacpac files to create another one.

The setup

I’m starting out with a standard BC container, which was created using BcContainerHelper, and it is called DenSterDev. Coincidentally, I am also using BcContainerHelper to extract the bacpacs and to create the new container. I am using the “C:\ProgramData\BcContainerHelper folder to store the bacpacs, because that folder is recognized both inside and outside of the container.

Extract Bacpac Files

The container is multi-tenant, so there are two databases that we care about: one is the app database, and the other is the tenant database. Both of those are necessary to create the new container. If you have any apps installed on top of the standard container, those will be included in the bacpac file for the app database, and the bacpac for the tenant database contains the data itself.

The benefit of using BcContainerHelper is that we have very handy Cmdlets to get all this stuff in and out of containers, and the bacpacs is no exception. The command is very easy:

Export-BcContainerDatabasesAsBacpac `
    -containerName 'DenSterDev' `
    -tenant default `
    -sqlCredential $Credential `
    -bacpacFolder C:\ProgramData\BcContainerHelper `
    -doNotCheckEntitlements

The tenant name is the default name of ‘default’ that is created in each standard BC container. The sqlCredential is a PSCredential object that was created during the container generation, using a username and a secure string password. As stated above, the bacpacFolder is a folder that can be accessed both in and out of the container. The entitlement flag is to bypass the check and prevent an error. When you execute this script, the bacpac files will show up in the bacpacFolder:

Create New Container from Bacpac

We are going to use these same bacpac files to create a new container. I’ll use the same container name:

New-BCContainer `
    -accept_eula `
    -containerName 'DenSterDev' `
    -artifactUrl '<ProperArtifactURL>' `
    -auth NavUserPassword `
    -assignPremiumPlan `
    -updateHosts `
    -accept_outdated `
    -Credential $Credential `
    -additionalParameters @('--env appbacpac=C:\ProgramData\BcContainerHelper\app.bacpac','--env tenantbacpac=C:\ProgramData\BcContainerHelper\default.bacpac')

Same as before, the -Credential parameter contains a PSCredential object. Note that the -additionalParameters spans across multiple lines here, but that should go on the same line in your PowerShell editor.

This command will download all the necessary artifacts and create the same container as the standard. The only difference will be that the app and tenant databases will be created from the bacpac files in your folder, instead of the standard database from the artifact. You can follow along with the script in the terminal window.

Nothing earth shattering, and made super easy by BcContainerHelper, but it took me a while to find the information and make this work. Hat’s off to Dmitry in the BC team, he was very patient with me as I got familiar with this process. Let me know in the comments if this was helpful or if you want to add anything.