THE Book on Automated Testing in BC

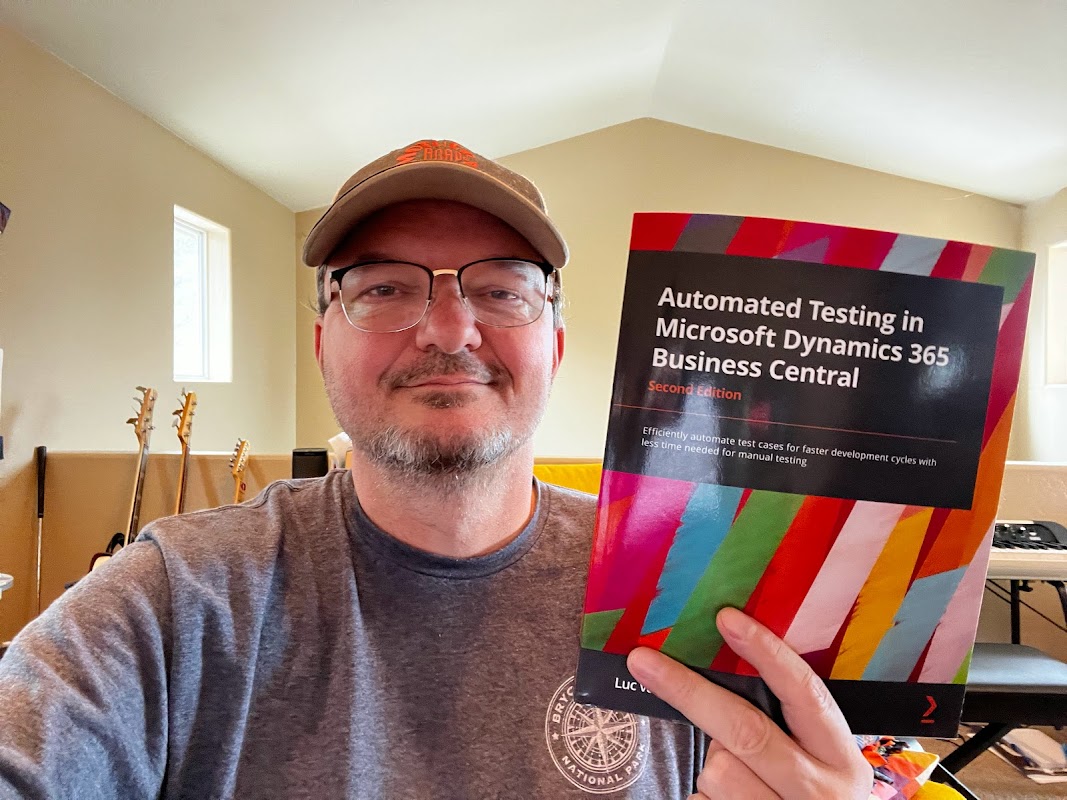
It has taken well over a year to write, and a good 8 months to review (and revise, and rewrite certain parts), and it has been delayed almost 3 months. I am SUPER proud to say though that the second edition of THE BOOK on automated testing in Business Central has been published!

As a reviewer of course I knew this was coming, and Luc finally shared the news

What if I Already Have the First Edition?

Of course you do! You are a BC professional, so therefore you’ve been adding automated testing to all of your projects right from the start, and you purchased Luc’s first book right when he wrote that. There are a few reasons why you should purchase the second edition

First of all, at 387 pages the second edition is almost twice the book as the first edition, which counts *only* 206 pages. Luc has added about a metric ton of stuff to the second edition. Not just expanded information on existing topics, but chapters about completely new topics altogether.

Major Improvements

One of the things that I thought was lacking in the first edition was more in-depth information about Test Driven Development (TDD for short). The mechanics of automated testing were solidly covered, and I was able to apply this knowledge in my work. What I was missing was how to take this to the next level. I knew there was a large methodological body of work out there about TDD, and I did not know where to start looking how that would be relevant for ME.

The second edition has filled that gap. Not only does Luc write eloquently about the methodology itself (there’s a whole chapter on TDD itself now), he puts it into the context of Business Central development specifically. He explains HOW you can use TDD in Business Central, he shows you step by step how to approach this, and he even provides a handy set of tools to support this methodology.

Luc spends a LOT of time writing about all aspects of TDD. More than just the nuts and bolts of creating test apps, he covers how to integrate automated tests in your daily development practice.

Advanced Topics

The brand new section called ‘Advanced Topics’ addresses some lesser known things such as refactoring your code to create more re-usable components, utilize standard components in more complex scenarios, the approach to testing web services and even how to make YOUR code more trestable.

In short, this second edition goes much more in-depth in just about every aspect of the book, plus it provides a wealth of information into a number of valuable topics that were not addressed in the first edition.

I am VERY proud to have played a part in writing this book, Luc did a phenomenal job in making the second edition a much more mature volume of THE book on automated testing in Business Central. Even if you already own the first edition, your money will not go to waste if you buy the second one.

Where can I get it?

Two places that I know of that you can get it:

  • The Packt Publishing website. Some people complain about delivery delays and such, but I don’t mind waiting a few days. When you get it from Packt directly, you have the option to have the book in print as well as e-book. The online reader on the Packt website is on of the best online readers I know. Plus with online access you can start reading right away, so to me well worth the handful of extra days for delivering the print book.
  • Amazon of course. Can’t beat delivery time, but Amazon does not bundle print + eBook and Packt does.
How to Populate a Test Suite

You’ve spent a bunch of time developing test codeunits, and you’ve figured out how to manually pull those into a Test Suite in the Business Central test toolkit. In this post, I will show you how you can automatically populate the test suite, which is especially useful for automatically testing your app in a build pipeline.

What Are We Talking About?

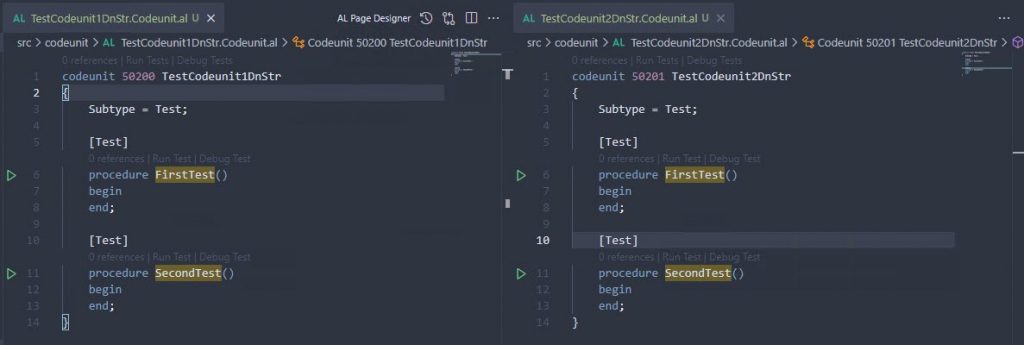
To keep the sample as simple as possible, I started with a Hello World app that I created with the “AL: Go!” command, plus a test app that has a dependency on it. In this test app, I have two test codeunits that don’t do anything. They are completely useless, just meant to show you how to get them into the test tool.

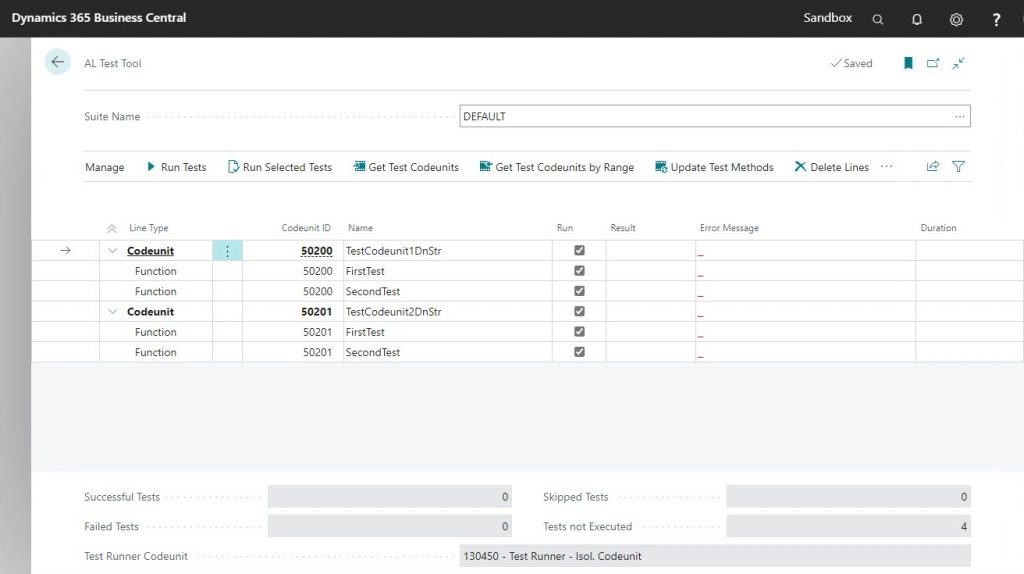
Those test codeunits are deployed into a BC container that has the test toolkit installed. This test toolkit (search for the ‘AL Test Tool’ in Alt+Q) is a UI that allows you to manually run these tests. Just like a standard BC journal page, when you first open the tool, it will create an empty record called ‘DEFAULT’ into which you must then get the test codeunits. Click on the “Get Test Codeunits” action, and only select the two useless codeunits. You should now see the codeunits and their functions in the Test Tool.

It’s kind of a drag to have to manually import the test codeunits into a Test Suite every time you modify something. To make it much easier on you, you can actually write code to do it for you. Put that code into an Install codeunit, and you never have to worry about manually creating a test suite again.

Show Me The Code!!

First we need an Install codeunit with an OnInstallAppPerCompany trigger, which is executed when the app is installed, both during an initial installation and also when performing an update or re-installation. You could probably create a separate “Initialize Test Suite” codeunit so you can run this logic in other places as well, but we are going to just write the code in our trigger directly.

The code below speaks mostly for itself. I like completely recreating the whole suite, but you can of course modify to your requirements. The important part of this example is a codeunit that Microsoft has given to us for this purpose called “Test Suite Mgt.”. This codeunit gives you several functions that you can use to make this possible.

codeunit 50202 InstallDnStr
{
    Subtype = Install;

    trigger OnInstallAppPerCompany()
    var
        TestSuite: Record "AL Test Suite";
        TestMethodLine: Record "Test Method Line";
        MyObject: Record AllObjWithCaption;
        TestSuiteMgt: Codeunit "Test Suite Mgt.";
        TestSuiteName: Code[10];
    begin
        TestSuiteName := 'SOME-NAME';

        // First, create a new Test Suite
        if TestSuite.Get(TestSuiteName) then begin
            TestSuiteMgt.DeleteAllMethods(TestSuite);
        end else begin
            TestSuiteMgt.CreateTestSuite(TestSuiteName);
            TestSuite.Get(TestSuiteName);
        end;

        // Second, pull in the test codeunits
        MyObject.SetRange("Object Type", MyObject."Object Type"::Codeunit);
        MyObject.SetFilter("Object ID", '50200..50249');
        MyObject.SetRange("Object Subtype", 'Test');
        if MyObject.FindSet() then begin
            repeat
                TestSuiteMgt.GetTestMethods(TestSuite, MyObject);
            until MyObject.Next() = 0;
        end;

        // Third, run the tests. This is of course an optional step
        TestMethodLine.SetRange("Test Suite", TestSuiteName);
        TestSuiteMgt.RunSelectedTests(TestMethodLine);
    end;
}

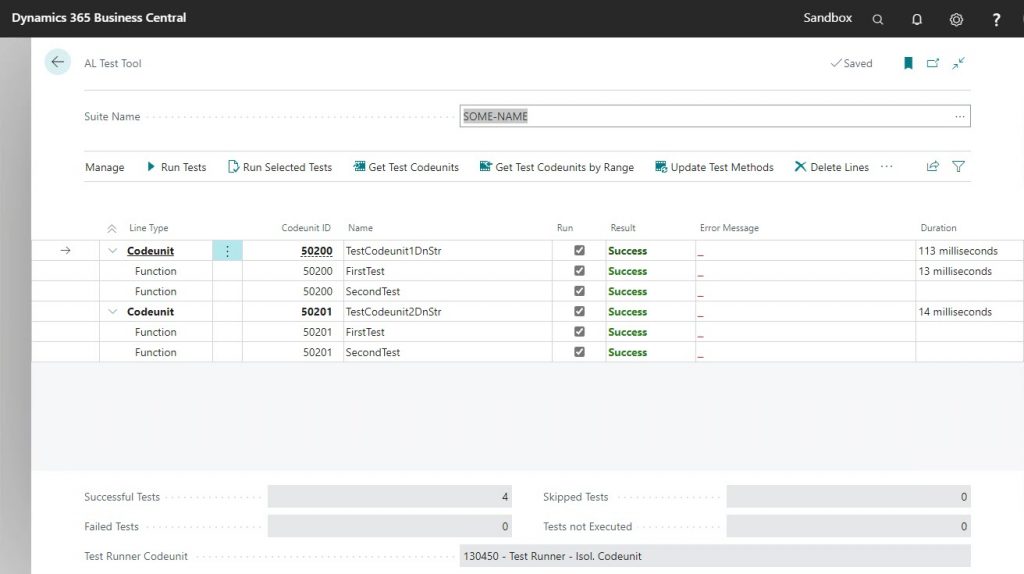
When you deploy your test app, it will now create a new Test Suite called ‘SOME-NAME’, it will pull your test codeunits with their test functions into the Test Suite, and it will execute all tests as part of the installation.

This code is very useful when you are developing the test code, because you won’t ever have to pull in any test codeunits into your test suite manually. Not only that, it will prove very useful when you start using pipelines, and you will be able to have precise control over which codeunits run at what point.

Dependencies

Here are the dependencies that I’m using :

  "dependencies": [
    {
      "id": "23de40a6-dfe8-4f80-80db-d70f83ce8caf",
      "name": "Test Runner",
      "publisher": "Microsoft",
      "version": "18.0.0.0"
    },
    {
      "id":  "5d86850b-0d76-4eca-bd7b-951ad998e997",
      "name":  "Tests-TestLibraries",
      "publisher":  "Microsoft",
      "version": "18.0.0.0"
    }
  ]

Credits

This post has been in my drafts for a while now, based on a question I posted to my Twitter, click on the Twee below to see the replies. The code in this post was copied almost verbatim from Krzysztof’s repo, he has a link in one of the replies. I had worked out my own example based on his code but I lost that when I had to clean up my VM’s.

Two Apps, One Repo

Whether you’re working on AppSource apps or Per Tenant Extensions, or even a code custom on premises extension, by now every one of your AL projects includes a test app right? This really means that every development project is really two apps. One is the app itself, the other the test app. In this post I’ll tell you an easy way to organize your workspace.

As you know, each AL workspace is essentially a folder with a file for each object, plus the necessary files to define the app itself. Since you are now also using source control, each AL workspace is also a Git repository. Logically, you would then have a repo for the app, and also a repo for the test app. What if I told you that you could have a single repo that includes both AL workspaces, all at the same time.

Start the Repo

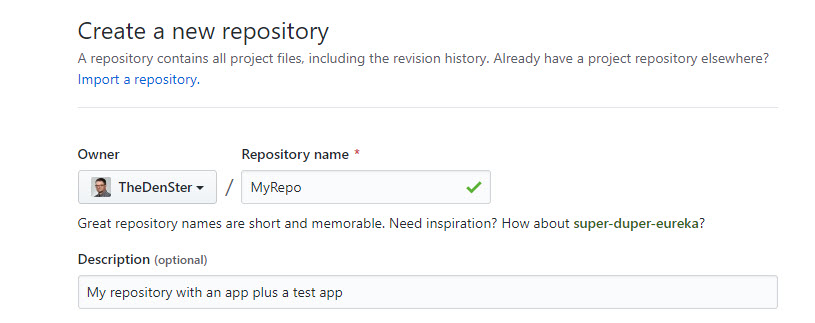
First, you create the repo itself, whether you’re on GitHub or Azure DevOps. This is essentially an empty repository, we will create the AL workspaces in a bit. Let’s call it ‘MyRepo’. I’ll include a .gitignore and a readme.

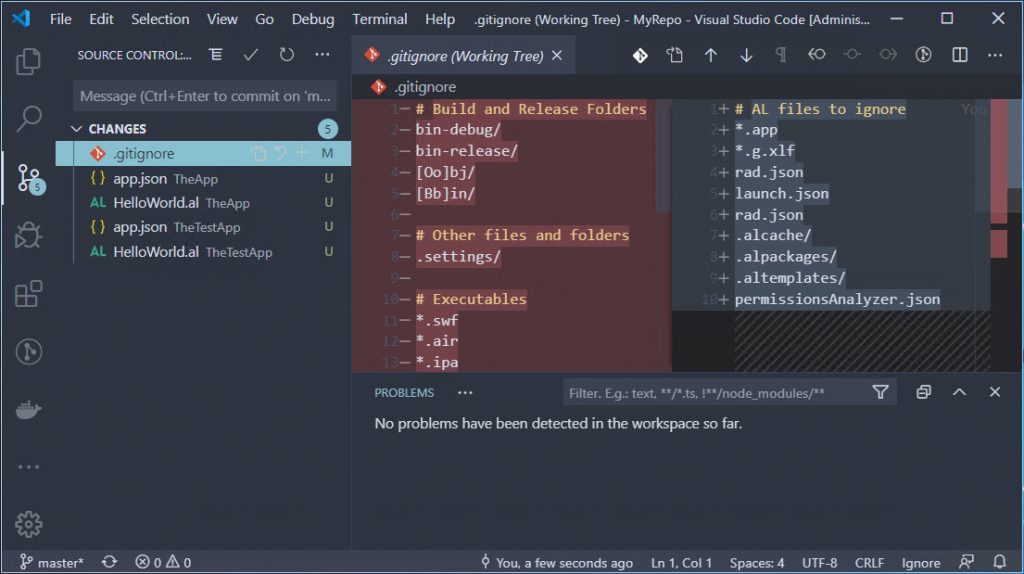
I’ll clone this repo in VSCode. Set up the .gitignore file for AL, and VSCode is now tracking everything that happens in this repo. Normally, you’d fill the new folder with the AL workspace files, so that this single repo has one single AL workspace. To have the app as well as the test app in this repo, you simply create two AL workspaces in the same folder.

Add the App Workspaces

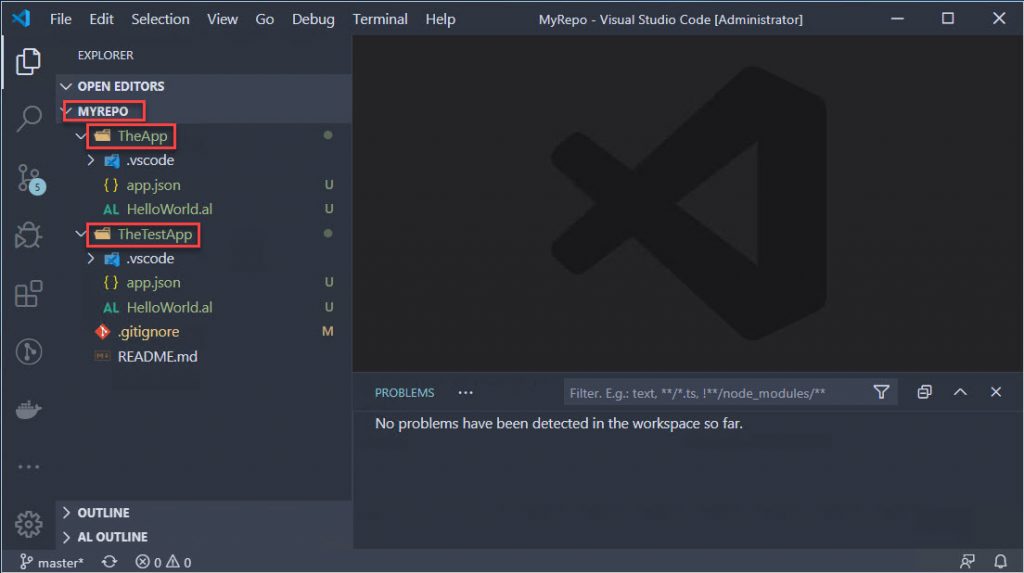
If you have existing apps, just copy the folders into the repository. If you are starting a new (test) app, use the ‘AL: Go!’ command, saving the project in the ‘MyRepo’ folder. Repeat for the test app. Each time that you create a new AL project, VSCode will automatically open the new workspace. To see the repo itself, re-open the MyRepo workspace and you will find the two apps in the same root folder.

Going to the Source Control tab you can see that it tracks changes in both folders, and the single gitignore file works on both of them. How to set this up as an app and test app is for another post, but you now have one single repository with two apps.

Work on Each App Separately

When you are looking at MyRepo in VSCode, at some point you will get a message that the manifest is missing, and you’ll get all sorts of messages in the problems window. You can’t even download symbols like this. In other words… you can’t really work on your app like this. I usually keep a folder with some PowerShell to create my development containers, I plan to keep app documentation in there as well, and it appears that this is the right place to store some pipeline files. To work on the apps themselves though, you will have to open the app’s folders in VSCode individually.

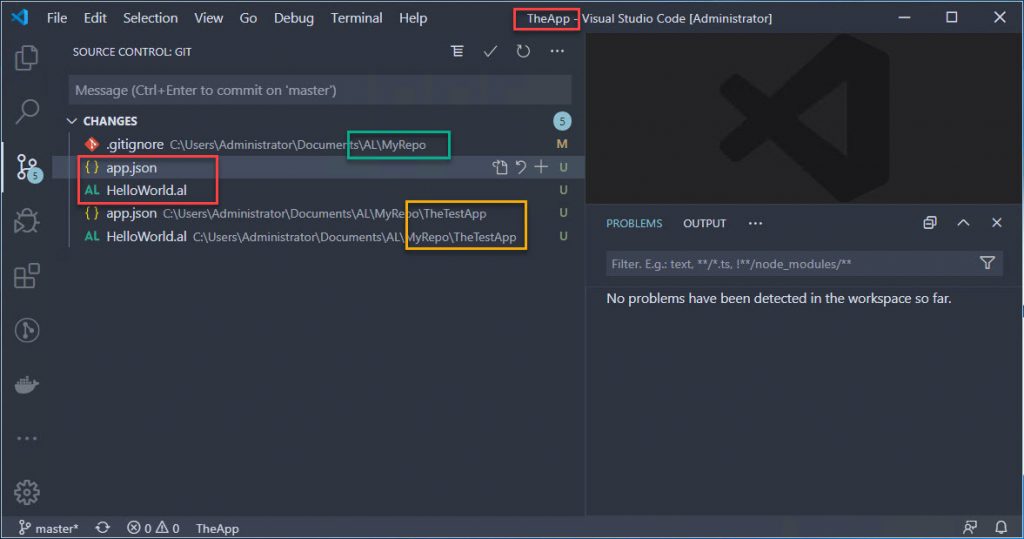
It gets a little tricky here because VSCode will show all the modified files for the whole repository in the Source Control tab. If you have modified files in both the app as well as in the test app, whether you are looking at one or the other, you will see them all.

The green one is a change I made to the gitignore file, which is in the root folder for the main repository. The red ones are changes in the AL workspace called ‘TheApp’, and finally the yellow ones are in ‘TheTestApp’. Whether you are looking at MyRepo or either one of the apps, you can commit any changes that you select to your repo from the App/TestApp folders.

The good part though is that you can simply open the app folder and work on that as if it were part of its own repo. Then you can commit and sync, open the test app and work on that. At the end of the day, when all objects are checked in, the single repo includes the app itself as well as the test app.

Each folder is considered its own AL workspace, so you can modify settings for the app and for the test app. What I really like about this way of working is that everything is part of a single repo. Two Apps, One Repo!

Using Workspaces

VSCode has something called ‘workspaces’. You may have noticed a selection on the File menu called ‘Add Folder to Workspace’. When you then save the workspace, VSCode will save a collection of attributes in what is called a ‘code-workspace’ file. I’ve tried to make this work, and I was wrestling with it a little bit. For instance, settings are defined inside the ‘code-workspace’ file instead of a separate settings.json file.

In addition there were some other things that confused me a little bit, so I posted a quick poll to my favorite hashtag, asking the community what they do, and there were quite a few votes.

It seems there are a few people working on posts about workspaces, so I will defer to them. I am looking forward to reading about that!