Commitment Issues

So you’re evolving your source control practice. You have created a ‘dev’ branch to keep work in progress away from the ‘main’ branch, and maybe you are even using feature branches or branches per developer. As you are putting in place branch policies to prevent just anybody from committing changes, you notice a pattern of commits being created just by merging a change into ‘main’. In this post I will show you how to limit the number of commits.

The Setup

I have a simple project in Azure DevOps, with a repo that has a default branch called ‘main’ and a ‘dev’ branch. The main branch requires a reviewer, which in Azure DevOps means that changes can only be made through pull requests. I’ve committed a couple of changes in dev and I have created a pull request to move that change into the main branch to be released. The PR has been approved and I have clicked the ‘Complete’ button on the PR. The Azure DevOps default Merge Type is set to ‘Merge’ and all looks well, so then I click the ‘Complete Merge’ button.

The Issue

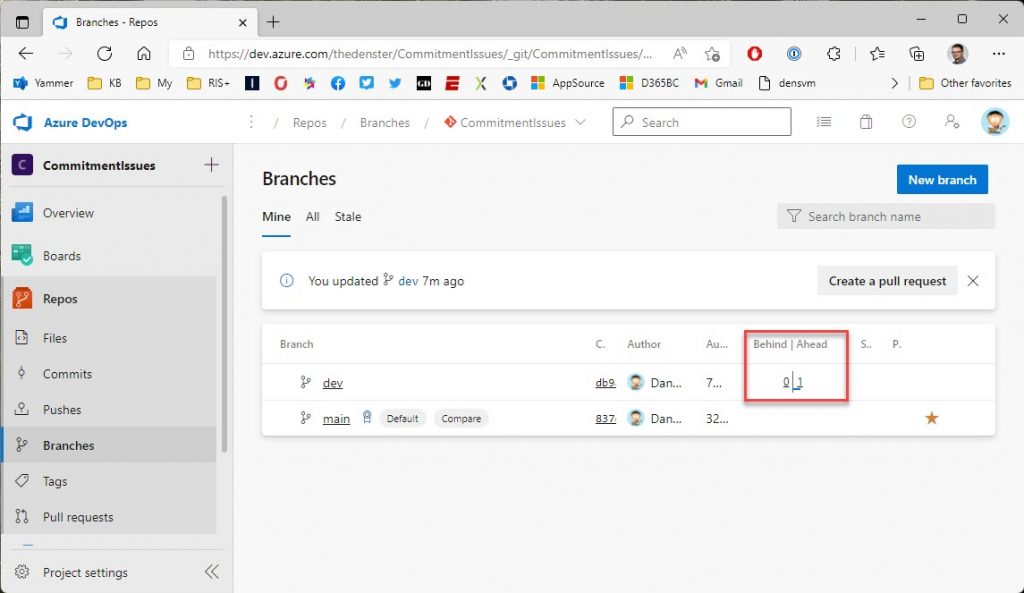
When the PR completes, you go back to the Branches view in Azure DevOps, and you notice that the dev branch is 1 commit behind on Main….

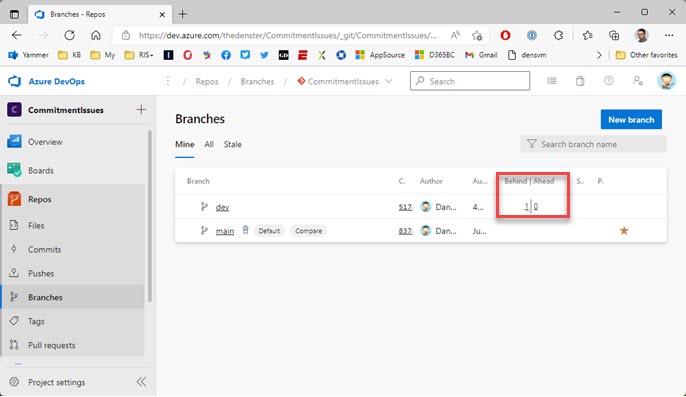
Wait, what? Didn’t I just merge 2 commits from dev into Main? The purpose of the PR was to synchronize the branches, but it appears that dev now a commit behind main. The Merge Type of ‘Merge’ created its own commit in the target branch, main in this case. When you go back to VSCode and merge main back into dev, you would notice that the source files themselves have not changed, even though Git has created two extra commits just from the Merge actions. You see, any time that you do a Merge in Git, it will generate a new commit.

If you were to do a file compare between the two branches, there would be no differences in the source files. The not so good part of using the Merge Type ‘Merge’ is that you will have to refresh your local main branch and merge that into your dev branch BEFORE you can continue developing. In itself maybe this works for many people but I prefer it if I can push out my dev work and continue developing without having to worry about being in synch with main.

A Better Way

There is another (I would argue a ‘better’) way to complete PRs. Another setup: I’ve updated my local main and merged that into my local dev branch; I have made another code change, which I have pushed that to the remote from my VSCode. The Branches view in Azure DevOps now shows dev is one commit ahead of main.

This time when you complete the PR, you select ‘Rebase and fast-forward’ as the Merge Type.

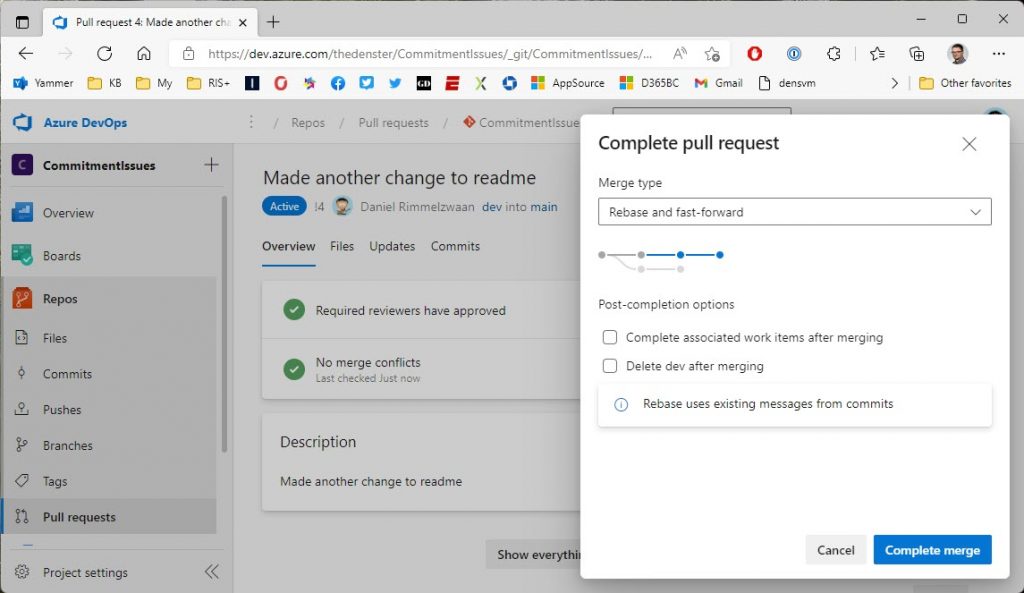
Because we are not merging, Git will not create a new commit. The result of this Merge Type is that the branches are in synch after completing the PR. There is no need for me to go back to VSCode and update my main branch.

So What is the Difference?

I’ll be totally honest here and tell you that I don’t really understand the difference between ‘Merge’ and ‘Rebase’. Something about where in the first the differences are actually merged and the changes are preserved in a new commit, and in the second the branch is rebased and the incoming changes are applied to that new base. I am sure that there is a distinct difference, and that this has an impact on the way you manage branches. I’ve looked for but could not find any posts that clearly explain the two with proper examples. I’m still looking, and I still want to know, but I have other more important things to worry about right now. Maybe a good topic to write about in the future :).

For practical purposes though, for the type of projects that I am involved in, I prefer the Rebase option. Personally, I prefer the branches to be synchronized when a PR is completed. Having to go back and pull the merge commit back into my local dev branch feels like a redundant step.

Source Code Management for Business Central

So you’re getting your feet wet with Visual Studio Code, and you’re starting to get the hang of how developing extensions for Business Central works. You’re getting comfortable with all the elements of a VSCode workspace and how to connect your workspace to your Docker container. Now is the time to dive into source code management.

One thing that makes it easy to get started is that Visual Studio Code supports source code management as a built-in feature of the program itself, through integrating with the GIT source control management protocol. You have to install this separately, but once you have all the right bits in place, VSCode will keep track of the changes that you make to your objects, and you can take action based on that, right inside VSCode.

Install the right bits

From what I understand, the reason why Git itself is not installed as part of VSCode is because of the open source license that comes with Git. As a result, you have to install the protocol separately. The installer can be found on the Git website at https://git-scm.com/. Click on the download button and just accept all the prompts in the installer (hit ‘next’ about 9 times). All you need to do now is restart VSCode, and now VSCode is integrated with Git. It will issue all the commands that you want as if they were features of VSCode itself.

Tell Git who you are

Basically, source control management is a system that keeps track of who made what changes to which files at what point in time. It is the ultimate CYA tool, and it also can and will be used against you :). You have to tell Git who you are by setting two global system parameters, the user’s name and email address. Enter these parameters in the Terminal window in VSCode.

Sign up for GitHub and create a repository

Go to https://github.com/, sign up for an account, using the same email that you entered in VSCode as the Git user email. This is a super easy thing to do, I’m sure you can figure that part out yourself.

Once you’re in your Github account, create a repository there. Either click on ‘new repository’ from the dropdown button right next to your avatar, or click on ‘repositories’ and then on ‘new’. Give it a name, and if you want to be adventurous add a .gitignore and/or a license. You will figure out about all the details as you learn to use this.

The repository on Github is your ‘remote’. The image shows a new empty repository called ‘Kerplunk’ in my GitHub account. I set it to private because there’s really nothing to share in there at this point.

Initialize your first repository

As you probably already know, the VSCode ‘workspace’ is nothing more than a folder on your local drive. By some lucky coincidence, Git also works with folders, only in SCM terms, a folder is called a ‘repository’. You will have to learn to call these ‘repos’ if you want to look like you know what you’re talking about. A ‘folder’, a ‘workspace’, a ‘repository’, they are really all the same thing.

In order to make this happen, you need to initialize the folder as a repo. The easiest way to do this is to copy the repo from github into VSCode. As you may have noticed, in Github there was a big green button called ‘clone or download’. When you click on that button, it will drop down a little box where you can copy the link to your repo.

Now go back to VSCode, open the command palette and issue the ‘Git: Clone’ command. It will now prompt you for a link (paste in the clone link) and a folder. VSCode will then download the content of the repo from Github. Just some terms that you have to know: the repo on Github is the ‘Remote’, the copy of that repo on your hard drive is called the ‘local repo’ and the process of downloading the remote to local is  called a ‘cloning’.

All Set

You are now ready to rock and roll with source code management. Open Windows Explorer and VSCode at the same time, and note that the content of the workspace in VSCode hides the Git folder. VSCode now knows that the workspace is also a repo, and to track all changes in there. Copy the files of a brand new AL project into the repo and see what happens. VSCode will notice that there are a few new files in the repo.

Note how the files in the workspace  get a green color, and there is a badge with the number 3 on the source control tab.

Stage, Commit and Sync

Remember, you are always working on a LOCAL copy of the repo, you never work directly in the remote repo. To get your changes into the remote is a two step process. First you have to save the changes to the LOCAL repo, which is called ‘Committing’ the changes. You get to decide which files you want to commit by way of a process called ‘staging’.

Click on the Source Control button in VSCode, and note that all changed files are listed under a heading called ‘CHANGES’. When you hover your mouse over either one of the files, it shows a plus sign. When you click on that plus, it will move the file to another heading called ‘STAGED CHANGES’. Those staged changes are the files that will be committed to the local repo. You can select all or some of the files and then hit the checkmark, which is the commit button. This writes the changes into your local repo.

The last step is to send the commits from your local to your remote repo. This is called the ‘Sync’ process. You can either issue the ‘Git: sync’ command from the command palette, or hit the Sync button in the status bar. VSCode will send any new changes to the remote, and it will download any new changes from the remote.

Now check your repo in github and verify that your changes are up there.

Congratulations my friend, are now using source control management 🙂

Update Sep 24, 2018: added YouTube link. As I was writing this post, I was also working on a training video to get started with source code management. You can find it on YouTube here:

Update March 30, 2019 – new screenshots to show current look of VSCode