Source Code Management for Business Central

So you’re getting your feet wet with Visual Studio Code, and you’re starting to get the hang of how developing extensions for Business Central works. You’re getting comfortable with all the elements of a VSCode workspace and how to connect your workspace to your Docker container. Now is the time to dive into source code management.

One thing that makes it easy to get started is that Visual Studio Code supports source code management as a built-in feature of the program itself, through integrating with the GIT source control management protocol. You have to install this separately, but once you have all the right bits in place, VSCode will keep track of the changes that you make to your objects, and you can take action based on that, right inside VSCode.

Install the right bits

From what I understand, the reason why Git itself is not installed as part of VSCode is because of the open source license that comes with Git. As a result, you have to install the protocol separately. The installer can be found on the Git website at https://git-scm.com/. Click on the download button and just accept all the prompts in the installer (hit ‘next’ about 9 times). All you need to do now is restart VSCode, and now VSCode is integrated with Git. It will issue all the commands that you want as if they were features of VSCode itself.

Tell Git who you are

Basically, source control management is a system that keeps track of who made what changes to which files at what point in time. It is the ultimate CYA tool, and it also can and will be used against you :). You have to tell Git who you are by setting two global system parameters, the user’s name and email address. Enter these parameters in the Terminal window in VSCode.

Sign up for GitHub and create a repository

Go to https://github.com/, sign up for an account, using the same email that you entered in VSCode as the Git user email. This is a super easy thing to do, I’m sure you can figure that part out yourself.

Once you’re in your Github account, create a repository there. Either click on ‘new repository’ from the dropdown button right next to your avatar, or click on ‘repositories’ and then on ‘new’. Give it a name, and if you want to be adventurous add a .gitignore and/or a license. You will figure out about all the details as you learn to use this.

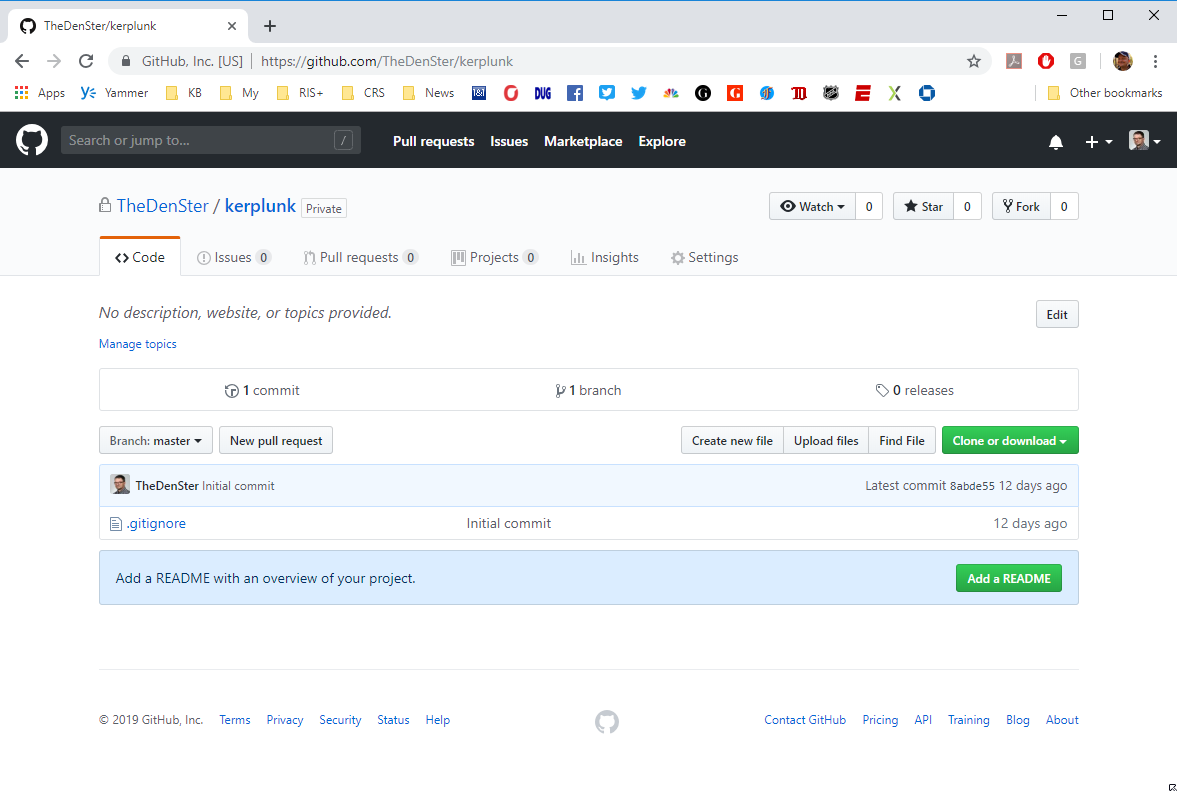
The repository on Github is your ‘remote’. The image shows a new empty repository called ‘Kerplunk’ in my GitHub account. I set it to private because there’s really nothing to share in there at this point.

Initialize your first repository

As you probably already know, the VSCode ‘workspace’ is nothing more than a folder on your local drive. By some lucky coincidence, Git also works with folders, only in SCM terms, a folder is called a ‘repository’. You will have to learn to call these ‘repos’ if you want to look like you know what you’re talking about. A ‘folder’, a ‘workspace’, a ‘repository’, they are really all the same thing.

In order to make this happen, you need to initialize the folder as a repo. The easiest way to do this is to copy the repo from github into VSCode. As you may have noticed, in Github there was a big green button called ‘clone or download’. When you click on that button, it will drop down a little box where you can copy the link to your repo.

Now go back to VSCode, open the command palette and issue the ‘Git: Clone’ command. It will now prompt you for a link (paste in the clone link) and a folder. VSCode will then download the content of the repo from Github. Just some terms that you have to know: the repo on Github is the ‘Remote’, the copy of that repo on your hard drive is called the ‘local repo’ and the process of downloading the remote to local is  called a ‘cloning’.

All Set

You are now ready to rock and roll with source code management. Open Windows Explorer and VSCode at the same time, and note that the content of the workspace in VSCode hides the Git folder. VSCode now knows that the workspace is also a repo, and to track all changes in there. Copy the files of a brand new AL project into the repo and see what happens. VSCode will notice that there are a few new files in the repo.

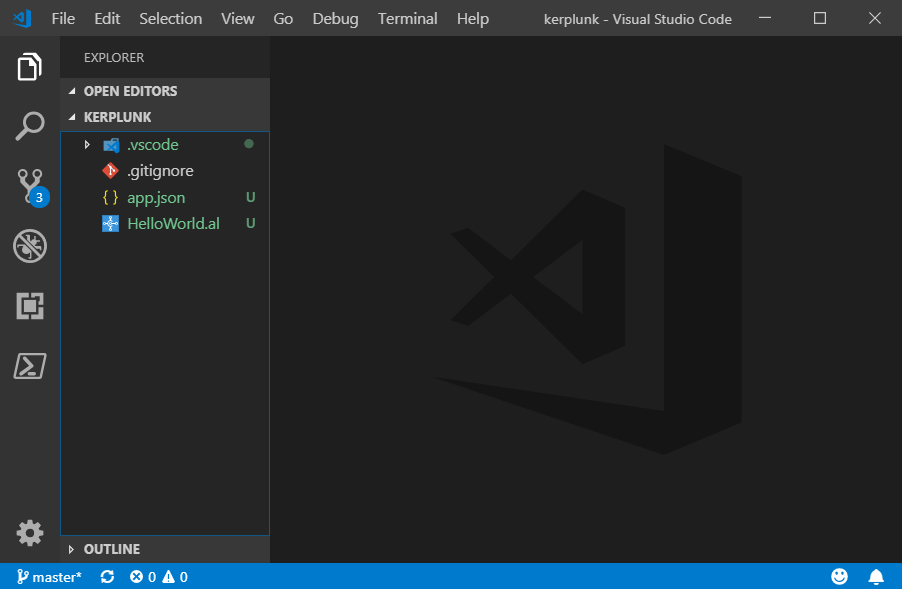
Note how the files in the workspace  get a green color, and there is a badge with the number 3 on the source control tab.

Stage, Commit and Sync

Remember, you are always working on a LOCAL copy of the repo, you never work directly in the remote repo. To get your changes into the remote is a two step process. First you have to save the changes to the LOCAL repo, which is called ‘Committing’ the changes. You get to decide which files you want to commit by way of a process called ‘staging’.

Click on the Source Control button in VSCode, and note that all changed files are listed under a heading called ‘CHANGES’. When you hover your mouse over either one of the files, it shows a plus sign. When you click on that plus, it will move the file to another heading called ‘STAGED CHANGES’. Those staged changes are the files that will be committed to the local repo. You can select all or some of the files and then hit the checkmark, which is the commit button. This writes the changes into your local repo.

The last step is to send the commits from your local to your remote repo. This is called the ‘Sync’ process. You can either issue the ‘Git: sync’ command from the command palette, or hit the Sync button in the status bar. VSCode will send any new changes to the remote, and it will download any new changes from the remote.

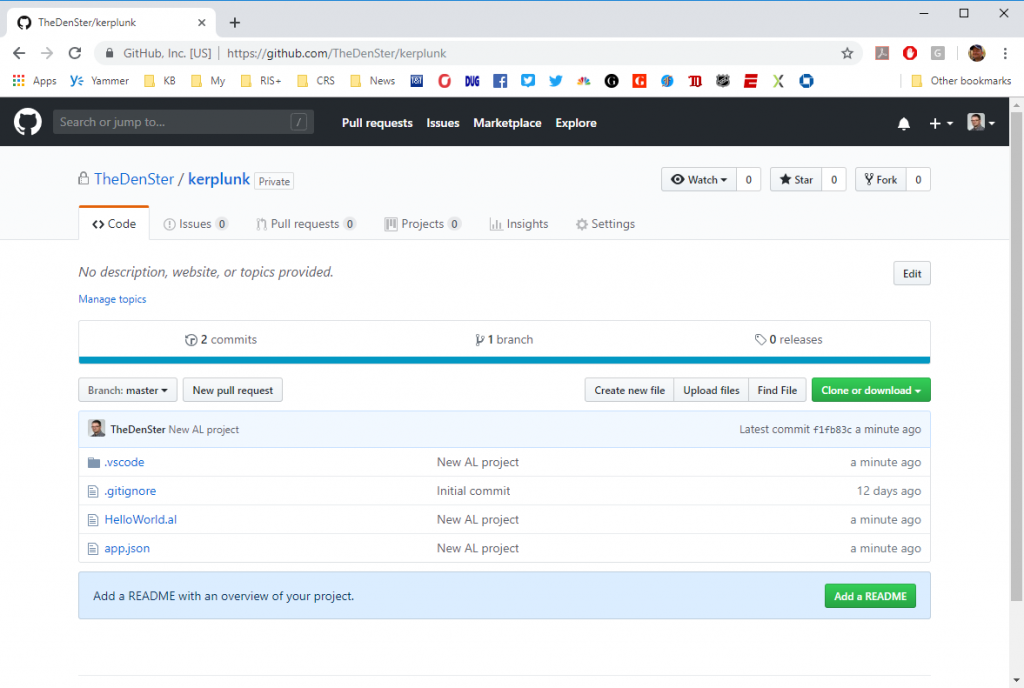
Now check your repo in github and verify that your changes are up there.

Congratulations my friend, are now using source control management 🙂

Update Sep 24, 2018: added YouTube link. As I was writing this post, I was also working on a training video to get started with source code management. You can find it on YouTube here:

Update March 30, 2019 – new screenshots to show current look of VSCode


Ready To Go

I’m on my way home from a bucket list kind of trip this past week. This post is more than just a travel log, I’ll get to a good link that you will be able to use to get Ready to Go for Business Central. Bear with me and let me tell the story of my trip 🙂

Through my work I’ve had the opportunity to travel pretty much to the opposite side of the globe to teach the CRS workshop for developing extensions for Business Central with VSCode. The first 2 day workshop was in Hong Kong on Monday and Tuesday, and then Thurday and Friday I hosted the same workshop in Manila. To have some time for sightseeing I arrived in Hong Kong on Saturday early morning. My hotel was on Hong Kong Island, and I spent the day mostly walking around the area near the hotel. It was a very long trip, and I had a looooong night sleep to recover from the journey.

On my flight over, I was a little too vigorous trying to clean the keyboard on my laptop, and it stopped working. As I kind of need a keyboard for the workshop, part of my Sunday sightseeing was to roam the city in search of an external keyboard, which fortunately I found. It’s an unusual souvenir, but I am actually typing this on a keyboard with Chinese characters.

Instead of my original plan to take a ferry across the harbor and find some of the famous food places, I stayed around town on the island. There was an awesome dragon boat race, and I took the trolley up to Victoria Peak, which is where I took the picture at the top of this post. It was fantastic to be in Hong Kong, the people were very hospitable, I really hope I get the chance to go back there some day and spend some serious time exploring the area there.

These workshops are part of a program called ‘Ready to Go’, which was created to help the Microsoft partner channel build the skills that are necessary to succeed in the new ecosystem for Business Central. I’ll post something with more details probably in a few days, and go into a little more detail then, but the link that you want to jot down is http://aka.ms/ReadyToGo. On this page, you will find a ton of good content, and even more links to other places with even more content. This link can be your starting point for any information that you might need to succeed.

The workshops were a success, and I’ve received lots of positive feedback. It was a pleasure visiting these two places, and I hope to go back there one day. These are people that are Ready to Go!

NAV Techdays 2018 – I’m Speaking!

Registration for NAV Techdays 2018 is open, and this year is going to be SUPER exciting for me, because I am going to teach an all-day pre-conference workshop! Go to the sessions overview page of the NAV Techdays website to see the details of all of the sessions and the pre-conference workshops. Of course I would LOVE it if you sign up for my workshop, but really you can’t go wrong with any of them.

My workshop is called “A Day in the Life of a Business Central Developer”. I still need to put the material together, but the plan is to cover all aspects of what it means to be a developer for Microsoft Dynamics 365 Business Central. Think about the development environment, how to create an app, how to create multiple apps with dependencies (an extension of another extension), how to connect to web services, how to use source control, and even design patterns and Docker.

I realize that it is a very ambitious agenda, but I am sure that we can fill a whole day with great content. I’m not sure if there will be much time to do any extensive lab work, so I might end up just teaching all day and giving you some things to take home and work on after the workshop is done.

Most importantly – go register for NAV Techdays, it is really THE premium event for our industry. Spend an extra couple of days in Antwerpen for the pre-conference workshops, they are all fantastic and worth every penny.

See you in Antwerpen in November!

Signing an App Package File

One of the cool things about my work is that I get to participate in some things very early. This is often really cool, but it also comes with some frustration when things don’t go very smoothly, or when there is little information to work with. One of those things, which I had absolutely NO knowledge of, was signing an app file… I had not a clue what this means, and no clue where to go to get this information.

The page where Microsoft explains how this works can be found here. It looks like a really nice and informative page now, but a few months ago it was confusing as heck, and it was not very helpful to me. At the time, I was working on an app for one of our customers, and one of the steps to get apps into AppSource is to sign the app file before you submit it.

Electronically signing a file is essentially a way to identify the source of the file and certify that the file comes from a known source. The ISV partner that develops an app must register with the signing authorities, and then every time that they release a file, they have to stamp that file with their identifying attributes. The process to do this is to ‘sign’ the file.

I’m not going into the details of how to get this done, the resource in Docs.microsoft is quite good now, so you can read it there. One thing I do want to share is that you should ALWAYS timestamp your signing. If you don’t timestamp the signature, your app will expire the same date as your certificate. If you DO timestamp, the signature will be timestamped with a date that was within the validity of your certification, and your app file will never expire. You do have to keep your certificate valid of course, but at least by timestamping the signature, the files that you sign will not expire.

During the whole process of getting the certificate and the signature, I worked with someone at Microsoft, who helped me get my customer’s app signed, and he also took my feedback to improve the documentation. I noticed something about the documentation that I think should be pointed out.

Documentation for Business Central is now in a new space called ‘docs.microsoft.com‘. In contrast with MSDN, Docs is almost interactive with the community. Maybe you’ve noticed, but each page in Docs has a feedback section. Scroll down on any page in there, and you will see that there is a section where you as a consumer of this information can leave your feedback.

I did this, and to my surprise I got an email. As it happened, the person that was working on the signing page knew my name and knew how to get a hold of me, and we worked together to make the page more informative. It was a coincidence that we knew about each other, but what was no coincidence was that there are actual product group people at Microsoft that are responsible for the documentation. There is a team of documentation people that watch out for issues on Docs, and they pick up issues within days of submission!!

The feedback system links back through GitHub issues, so if you’ve ever submitted something to the AL team, you know that this is pretty direct communication. I am wondering though, if Microsoft will take this a step further, and open up Docs as a public repository where people can make suggested changes. I think yes, but I’m not sure because there’s not really a history of direct collaboration like that. I have good hope though, because the culture at Microsoft is getting more collaborative by the day.

Translations for Business Central Apps

My struggle to get the new translation files right has been real and too long to recount on this blog. When I finally got it right, it felt like it was more of a coincidence than actual skill to finally get it done.

It started with the app submission checklist, where one of the requirements is to “include all translations of countries your extension is supporting”. The app that I was working on was targeted for the US market, so all I needed was a translation file for ‘en-US’. The page on docs that explains translations explained what I needed to do. Or did it?

Turning on the translation feature in the app.json file and replacing all ML captions and such was easy enough. The trouble begins when you run into the details.

As soon as you rebuild the app, VSCode generated the default translation file in a new folder called ‘Translations’, and the translation file will be called “<YourAppname>.g.xlf”. Because the development language is ‘en-US’, this generated translation file is also specified for the ‘en-US’ language.

The translation page on Docs specifies that you need to copy the generated file “to avoid that the file is overwritten next time the extension is built”. Each time that you build the app it will re-create the generated xlf file. What that means is that you need to make a copy of the translation file and use the copy to do your actual translation work.

So I did make that copy, and because I was working on a US only app, I felt I was done with my translation. I had the generated file in my workspace, I had a copy of it for the ‘en-US’ language, I thought I was good to go. Alas, the app submission failed because they could not find any translation file in my app. Something was missing from my translation file.

The generated file only has nodes for “source”, which comes from all of your text strings like labels and captions and comments and such. The translation itself is in a node that is NOT included in the generated xlf file, you have to create that. The name of this node is “target”, and this is where the actual translation goes for each source element.

So, I copied and pasted all of the source nodes, made target nodes out of them, and by this time I had a direct line to the validation person at Microsoft, who was willing to hop on a Skype call and look at my workspace. He was also surprised to see that my workspace DID have the translation file, while the app file that I sent to him did not. As it turns out, the target node needs to have an attribute called “state” with a value “translated”.

In order to get the translation file in its proper state, you should use the proper tool, and I found that the Microsoft Multilingual app toolkit editor is the easiest one to work with. It puts the right elements into the xlf file, and when I used that tool, my app file was finally accepted.

How Do I Videos

My company was commissioned late last year to create some short ‘How Do I’ videos on how to accomplish a bunch of simple technical tasks in Business Central. In total we created about a dozen videos, and they were all published on the “Dynamics 365” channel on YouTube. This channel has a TON of video content about all sorts of topics related to Dynamics 365 in general. Business Central is actually not a main topic in this channel, they are mostly focused on Sales, Marketing, Operations.

Anyway, I wanted to put links to the videos that I recorded in a blog post, so it would be easy to find them. As a result of these videos, we’ve been commissioned to create 30 hours of real training material for Business Central. Yes you read that right… THIRTY HOURS!!!! That’s almost a whole week!!!! Unfortunately, these larger videos will be published in the Dynamics Learning Portal, which is a subscription service inside PartnerSource. You have to have PartnerSource access and also pay extra to be able to access those videos.

I’ve already brought up in an internal meeting that it would be really cool if those videos could be public, and I did not get shot down. I doubt that they will be though, but I will make it a mission to mention this at every step of the way. I’ll keep you posted. On to the videos…

The first one is an easy one, how to add a field in an extension:

Next, how to add a field with a foreign key relation to another table:

Next, how to add some AL code to an extension:

Then, how to add upgrade logic to an extension:

And finally, how to connect to a web service:

Install from .vsix

This is a quick blog about installing the AL language for Visual Studio Code from a .vsix file.

When you create a developer preview Azure VM for AL development, you get a landing page to access this VM. The script that creates this VM will put all the components on the VM that you need to do your development, including the correct version of the AL Language extension for VS Code.

If you want to do your development locally, you will need to put the right version of the AL Language extension on your local installation of VS Code. Lucky for you, there is a link on the landing page for your VM that will download the installation package into your downloads folder. The file has the extension .vsix, which is what VS Code needs.

All you need to do is press Ctrl+Shift+P and type ‘vsix’ in the command palette, and VS Code will suggest ‘Extensions: Install from vsix…’. When you select this, you need to browse to the file, and hit the ‘Install’ button. If you already have another version of the AL Language installed, you’ll need to disable that, so that there is no confusion about which one VSCode uses.

Keep Your Data When Developing

One of the most frequent questions I get in our workshops is how can I keep my test data when I am developing in AL. For this, Microsoft has given us a new property that you can set in launch.json, read on to learn the details :).

Up until now, every time you hit F5 in AL to test your app, you have to start from scratch to enter some test data, of put together some data creation code in an install codeunit to populate your tables automatically. The reason is that the default behavior of the AL Language extension was to completely recreate and rebuild the app, every time you hit F5. This means that behind the scenes, your current installed version is completely destroyed, and then VSCode recreates the .app file and publishes/installs the app for you. As a consequence all the test data goes kerblammo, and you are stuck having to enter all the test data again. Not a big deal if it’s a setting or two, but if you added some fields to an existing table that you need some values in, and you need some data in your custom tables, it can get very tedious very quickly.

Microsoft has given us a new property called ‘schemaUpdateMode’ that goes into launch.json. If you leave this property out, the default behavior stays the same, so it recreates the app every time you hit F5. You can of course also add the property and set it to “Recreate” just to make sure. If you want to keep your data though, you can set it to “Synchronize”, which will keep your data intact.

Be aware that if you increase your app version, you will also need to use Powershell to Synch and run the data upgrade.

Extensions V1 vs V2

You might have heard people talk about “Extensions v2”, and maybe that doesn’t make a whole lot of sense. Let me take a few minutes and try to explain the concept to you.

Back in 2015, Microsoft announced the concept of extensions to us, in this blog post. I remember reading this article, and being thoroughly confused. At the time I was not in a technical role, and I had let my technical knowledge slip for just a minute it seems.

Extensions v1

For extensions v1, development is done in good old C/SIDE. There are severe limitations as to what you are allowed to do. For instance, you cannot add values to option strings in table fields, and you cannot add code to actions on pages. I won’t get into the details of those limitations, but you must be aware of what you can and cannot do for extensions, because in C/SIDE you can do a LOT more than what you are allowed to do.

The extension itself is compiled in a so-called .NAVX file, also know as a NAV App file. To get to this package file, you must use PowerShell Cmdlets to export the original and modified objects, calculate the delta files, and then build the .NAVX file. To deploy this .NAVX file, you then must use another set of PowerShell Cmdlets.

Especially the development part can be cumbersome. There are many things you are not allowed to do, and as you build the .NAVX file, the system will yell at you when you did something wrong. There are many moving parts, and it takes a lot of discipline to get it right

Extensions v2

For extensions v2, development is done in Visual Studio Code (also known as VSCode), using the AL Language extension. Since you are no longer working in C/SIDE, only the allowable things are allowed. You simply cannot do anything that the tool is not capable of doing. You no longer have to export original objects and compare them to modified objects. Essentially, you are programming the delta files directly in VSCode.

Deploying the solution works simply by building the project from VSCode. You hit F5 and VSCode will build the package and deploys it to the service tier that you specify in the launch file. Deploying the app to a test system still happens with PowerShell Cmdlets.

Hopefully this clears it up a little bit. Once you understand the differences, it’s not so intimidating any longer.

Localize Objects with PowerShell and VSCode

In this article I will explain how you can use PowerShell to extract the right objects and merge those objects, and how to use Visual Studio Code to resolve most of the conflicts in the merged objects.

In a previous article, I explained how you can use PowerShell to create the environments. The script in this article actually use the variables that are assigned in the other one. What I should really do is create a configuration file and load that from both scripts. I wanted to share what I have so far though, without a handy configuration file but hopefully helpful nonetheless.

We start off with the 4 environments that were created in our last article: ORIGINAL, MODIFIED, TARGET, and RESULT. The first two environments contain the standard W1 and the ISV product. Target and RESULT are identical at this point, and they both contain the standard NA localization. All environments are in the same build number (NAV 2017 CU2 in this case). Because I have a developer license that has insert rights in the ISV number range, my strategy is to merge the product modifications into the NA database. If you do not have those insert rights, then a better strategy would be to merge the NA localization into the product environment instead. Microsoft has recently added insert capabilities for the standard object ranges to regular developer licenses, for this particular purpose. As I was working through the conflict objects of this assignment, I was thinking that this may even be the best default strategy anyway.

Due to a limited amount of time, and a limited amount of PowerShell skill, I decided to approach this task pragmatically:

  • Manually move the ISV specific objects to the RESULT environment
  • Use PowerShell to export all the objects
  • Manually eliminate the unmodified objects
    • NOTE: as I learned later, Waldo’s PowerShell modules actually have logic to remove these after the merge, so this can be scripted as well
  • Use PowerShell to merge the objects
  • Use Visual Studio Code (AKA VSCode) to resolve the conflicts as much as possible
  • Use PowerShell to join the objects
  • Use C/SIDE to resolve any remaining conflicts

The conflict resolution is something that has to be done manually. Everything else can be scripted in PowerShell. During this process I’ve asked Waldo for some help, and he explained that most of what I am doing here is already part of the merge sample scripts. In the Cloud Ready Software PowerShell module, there is a folder called “PSScripts”, and in that folder you will find a large number of scripts that you can use as an example to get started on your task. As you gain experience in using PowerShell, you will recognize a lot of useful features in those scripts, and you can modify them to your specific needs.

Alright, on to the details. The first part is to use PowerShell to extract the objects into their own folders. I also added commands to create the folder structure itself:

At this point, you will have an “Objects” folder in your working folder, with full object files for ORIGINAL, MODIFIED, and TARGET. Those object files have then been split into individual object files in the ORIGINAL, MODIFIED, and TARGET folders. Before using PowerShell to merge those objects, I used a text compare tool (I like Scooter Software’s Beyond Compare) to eliminate unmodified objects. Remember, I only want to work on the modified objects, so I don’t have to worry about getting confused by objects that were not changed for the ISV product.

Now that we only have modified objects in all three object folders, we’ll use the merge Cmdlet to do the actual merging of the objects.

If you notice, the output of the “Merge-NAVApplicationObject” Cmdlet is loaded into the variable “$MergeResult”. This object is then piped into the “Merge-NAVApplicationObjectProperty” Cmdlet. The first Cmdlet is a standard NAV PowerShell Cmdlet, and the second one comes with the Cloud Ready Software modules. The standard merge Cmdlet does not merge the Version List property, it simply takes the Version List from one of the three environments. We can have a discussion about whether the Version List is even important anymore, especially if you use Source Code Management. The reality is that most NAV developers depend on proper tags in the Version List, so it is useful to merge those as well. All you need to do is specify the prefixes that you want to merge (In my case NAVW1 and NAVNA) and it will find the highest value for those prefixes. All other prefixes will be simply copied into the RESULT objects.

At this point, we have all merged files in the RESULT folder. This includes the objects that were merged successfully, but also the objects that the merge Cmdlet could not resolve, for instance when code was added at the same position in MODIFIED and in TARGET. Since we are going to have to learn how to use VSCode, I decided to use that to resolve the conflicts.

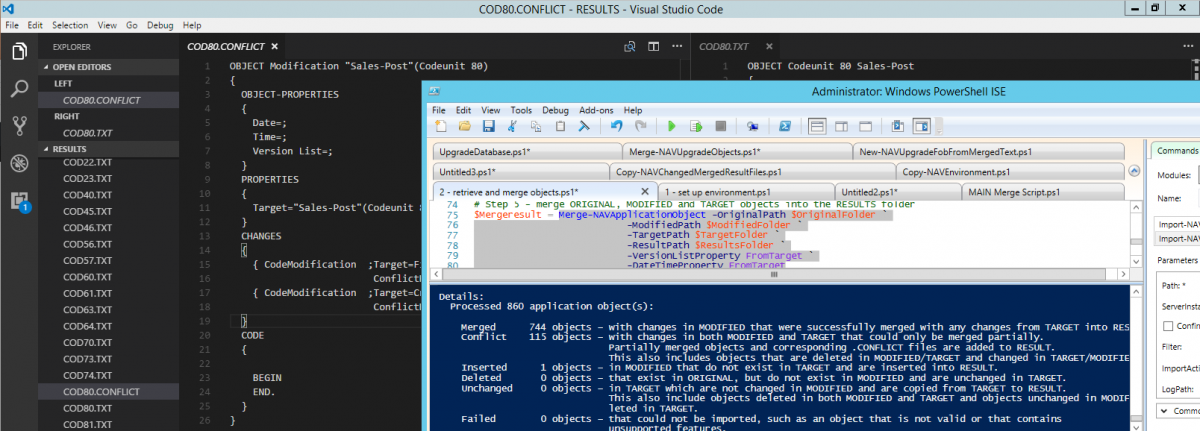
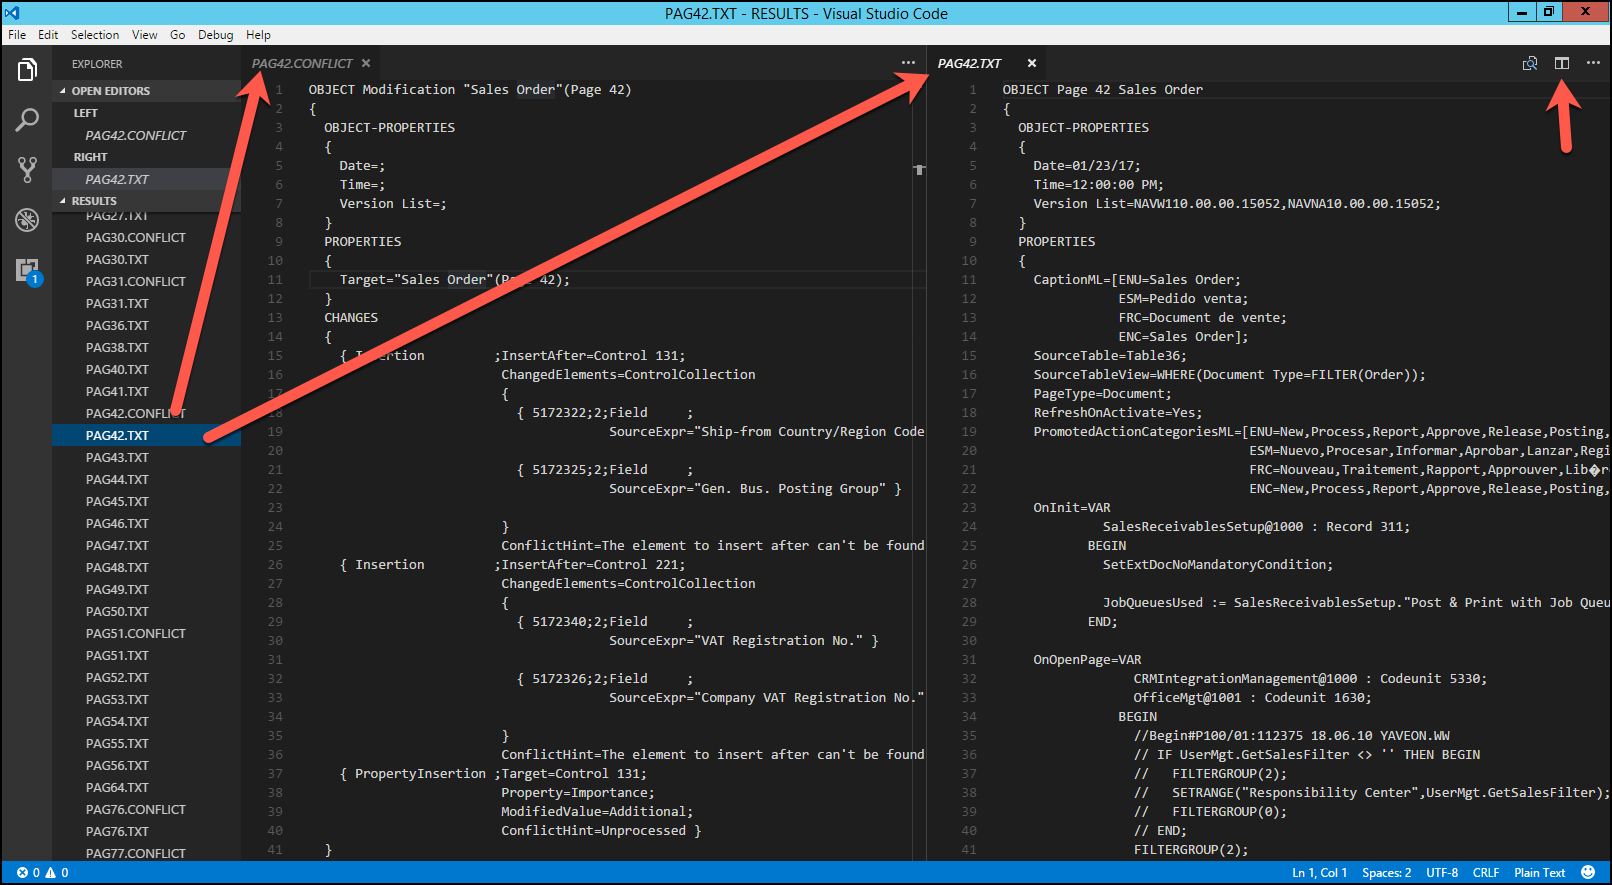
With VSCode installed, you can open the RESULT folder and see the content of this folder inside the file browser at the left hand side. In the upper right hand corner is a button that you can use to split the screen into two (and even three) editor windows. This is very useful for resolving merge conflicts, because you can open the conflict file in one side, and the object file in the other side. You are editing the actual object file here, so you may want to take a backup copy of the folder before you get started.

Now what you must understand is that the conflict files only contains the pieces that the merge Cmdlet could not figure out. In a total of 860 objects, with 6956 individual changes, it was able to merge 96.4% of those changes. An object that may have 4 conflicts can also have a ton of other changes that the merge Cmdlet merged successfully. All YOU have to do is focus on the ones that need manual attention. For instance, codeunits 80 and 90 had a TON of modifications, but it only needed help with 3 of them.

I had a total of 115 conflict files, and I could completely resolve 112 of them in VSCode. I made a note of the few that remained, and decided to import those unchanged into C/SIDE, so I can finish those off in the proper IDE.

The last PowerShell command that I used is to create a single object file, which can then be imported into C/SIDE. Then I finished the last few remaining object files, and was able to compile all objects from there.

I’ve done many of these merges completely manually. To say that I was skeptical that PowerShell would do a good job is putting it mildly. I flat out did not trust the merge Cmdlet, surely they could not do as good a job as I could do. I was wrong. I checked a bunch of objects to see if I could find any mistakes and I could not find any. Not only did the merge Cmdlet do a fine job at merging the objects, it did so in about 5 minutes flat.

You can download the scripts here.

Instead of having to manually merge almost 900 objects, all I had to do was focus on the conflicts. Usually, a vertical merge like this would take me anywhere from 2 to 4 weeks, and I was able to finish this one in less than two days. Figuring out the PowerShell scripts took me much longer, but I will be able to use those for the next merge task.