Everybody knows about AppSource by now. Everybody is also struggling how to make AppSource work for them, and especially how to provide customers and prospects a trial of their functionality. You could create a sandbox environment and try things out in there, but that doesn’t have test data that is specific for your product. You could install the product into a production tenant, but then you have an app in there that you might not want after all.
One of the lesser known features of AppSource is the Test Drive. This feature provides an ISV partner a completely isolated trial experience of their product, in an environment that is completely in their control. What’s even better is that the Test Drive can be done in a number of different ways, so you can tailor it exactly to your requirements.
The Test Drive can be a part of a comprehensive marketing strategy, in which you can implement an environment that can showcase even the most complex features of your software, in a way that provides ample opportunity to your customers to learn how to use your product in a non-production environment that is still in the cloud, without having to get a team of consultants onsite.
The way that it works is essentially that the Test Drive is a standalone tenant that has a template company. This template company has your product already installed, and it has proper test data already populated. You can create all the data that you need for your product to run properly. Then, through the SaaSification techniques, you would implement a path into the features of your product, taking the user into your product one step at a time.
If you are interested in providing a Test Drive, please watch this video, in which I go into some more detail about this feature.
To find out more about the test drive, and other information about apps for Business Central, visit http://aka.ms/ReadyToGo
Today is a Very Big Day! Allow me to tell you why 🙂
Maybe you remember a few months ago, when I posted some ‘how do I’ videos, I also mentioned that I was working on hours and hours of training material for Business Central. To make a long story short: my company was commissioned to create a long list of technical training videos. Originally, those videos would be published in the Dynamics Learning Portal (DLP). For those of you that don’t know, the DLP is a website where you can find a ton of training resources for a variety of Microsoft Dynamics products, including NAV and Business Central. There are a few caveats about DLP: not only is it inside PartnerPortal, you have to pay extra to get access to it. Partners who don’t pay this extra fee do not get access to DLP.
As soon as I started working on these training videos, I started mentioning how cool it would be to have these videos available for a wider audience, and every chance I got I would repeat that to anybody who would listen. At some point the decision was made to lift these videos from behind the paywall. They would still be inside DLP, but anyone with PartnerSource access would be able to see them. I was still not happy with that, after all PartnerSource is not free.
Now, exactly how much influence I have over these types of decisions is up for debate, but I do know that I recorded these videos, I had daily status calls with people from Microsoft, and I mentioned it to everyone that it would be great to make ALL of these videos available to the public.
We still have more videos to create, and they should be added to the playlist as I finish them. At some point I’m expecting Microsoft to add more content to this channel, so it won’t be just me on there, but for now I am almost giddy with excitement.
Now like I said I don’t know just how much my insistence has played a part in this, but when I first started with this project the only plan was to publish these videos to DLP. In my mind I single-handedly convinced Microsoft to release all this great content to the public.
So you’re getting your feet wet with Visual Studio Code, and you’re starting to get the hang of how developing extensions for Business Central works. You’re getting comfortable with all the elements of a VSCode workspace and how to connect your workspace to your Docker container. Now is the time to dive into source code management.
One thing that makes it easy to get started is that Visual Studio Code supports source code management as a built-in feature of the program itself, through integrating with the GIT source control management protocol. You have to install this separately, but once you have all the right bits in place, VSCode will keep track of the changes that you make to your objects, and you can take action based on that, right inside VSCode.
Install the right bits
From what I understand, the reason why Git itself is not installed as part of VSCode is because of the open source license that comes with Git. As a result, you have to install the protocol separately. The installer can be found on the Git website at https://git-scm.com/. Click on the download button and just accept all the prompts in the installer (hit ‘next’ about 9 times). All you need to do now is restart VSCode, and now VSCode is integrated with Git. It will issue all the commands that you want as if they were features of VSCode itself.
Tell Git who you are
Basically, source control management is a system that keeps track of who made what changes to which files at what point in time. It is the ultimate CYA tool, and it also can and will be used against you :). You have to tell Git who you are by setting two global system parameters, the user’s name and email address. Enter these parameters in the Terminal window in VSCode.
Sign up for GitHub and create a repository
Go to https://github.com/, sign up for an account, using the same email that you entered in VSCode as the Git user email. This is a super easy thing to do, I’m sure you can figure that part out yourself.
Once you’re in your Github account, create a repository there. Either click on ‘new repository’ from the dropdown button right next to your avatar, or click on ‘repositories’ and then on ‘new’. Give it a name, and if you want to be adventurous add a .gitignore and/or a license. You will figure out about all the details as you learn to use this.
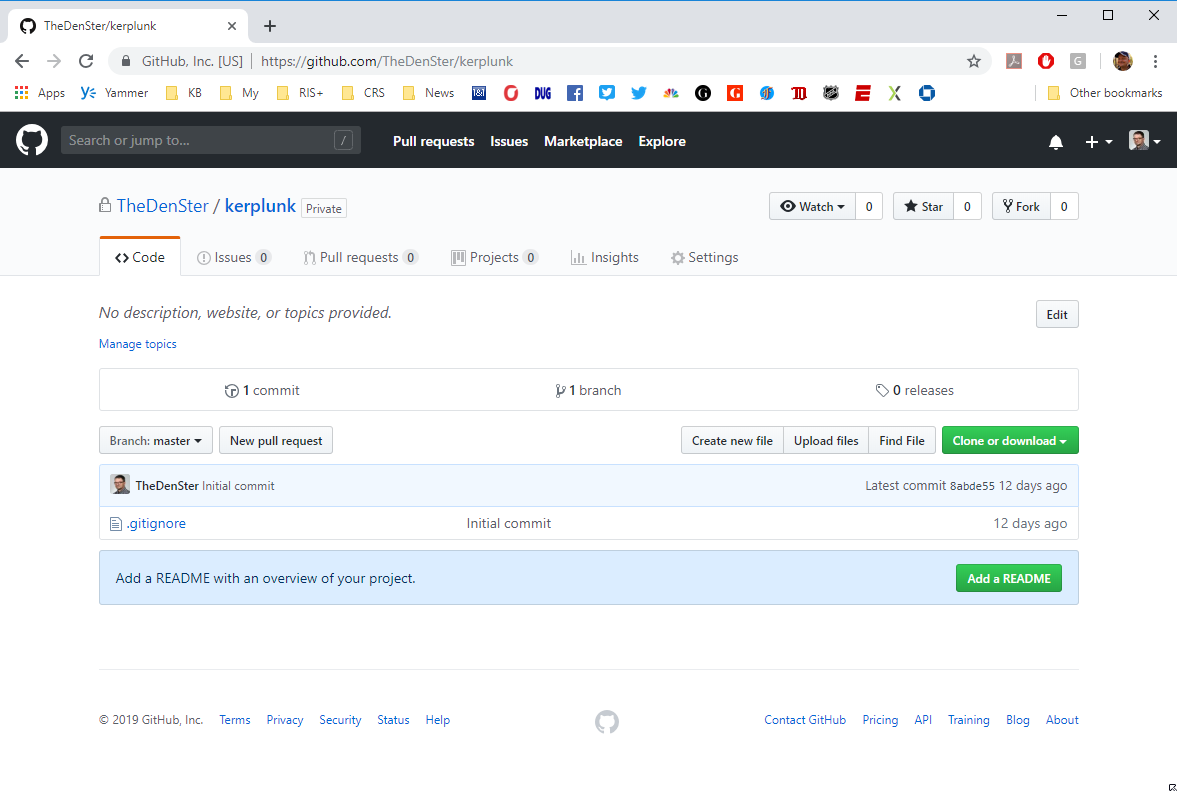
The repository on Github is your ‘remote’. The image shows a new empty repository called ‘Kerplunk’ in my GitHub account. I set it to private because there’s really nothing to share in there at this point.
Initialize your first repository
As you probably already know, the VSCode ‘workspace’ is nothing more than a folder on your local drive. By some lucky coincidence, Git also works with folders, only in SCM terms, a folder is called a ‘repository’. You will have to learn to call these ‘repos’ if you want to look like you know what you’re talking about. A ‘folder’, a ‘workspace’, a ‘repository’, they are really all the same thing.
In order to make this happen, you need to initialize the folder as a repo. The easiest way to do this is to copy the repo from github into VSCode. As you may have noticed, in Github there was a big green button called ‘clone or download’. When you click on that button, it will drop down a little box where you can copy the link to your repo.
Now go back to VSCode, open the command palette and issue the ‘Git: Clone’ command. It will now prompt you for a link (paste in the clone link) and a folder. VSCode will then download the content of the repo from Github. Just some terms that you have to know: the repo on Github is the ‘Remote’, the copy of that repo on your hard drive is called the ‘local repo’ and the process of downloading the remote to local is called a ‘cloning’.
All Set
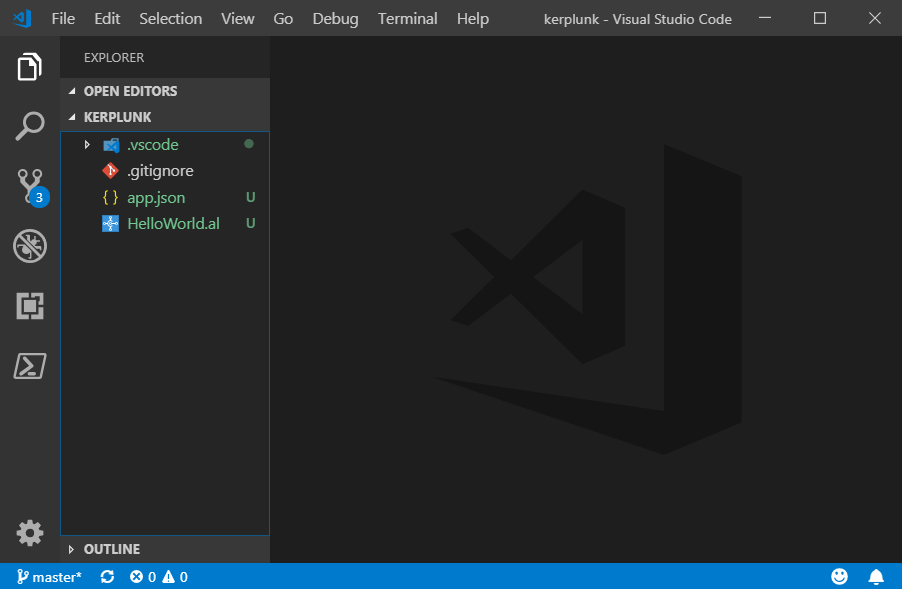
You are now ready to rock and roll with source code management. Open Windows Explorer and VSCode at the same time, and note that the content of the workspace in VSCode hides the Git folder. VSCode now knows that the workspace is also a repo, and to track all changes in there. Copy the files of a brand new AL project into the repo and see what happens. VSCode will notice that there are a few new files in the repo.
Note how the files in the workspace get a green color, and there is a badge with the number 3 on the source control tab.
Stage, Commit and Sync
Remember, you are always working on a LOCAL copy of the repo, you never work directly in the remote repo. To get your changes into the remote is a two step process. First you have to save the changes to the LOCAL repo, which is called ‘Committing’ the changes. You get to decide which files you want to commit by way of a process called ‘staging’.
Click on the Source Control button in VSCode, and note that all changed files are listed under a heading called ‘CHANGES’. When you hover your mouse over either one of the files, it shows a plus sign. When you click on that plus, it will move the file to another heading called ‘STAGED CHANGES’. Those staged changes are the files that will be committed to the local repo. You can select all or some of the files and then hit the checkmark, which is the commit button. This writes the changes into your local repo.
The last step is to send the commits from your local to your remote repo. This is called the ‘Sync’ process. You can either issue the ‘Git: sync’ command from the command palette, or hit the Sync button in the status bar. VSCode will send any new changes to the remote, and it will download any new changes from the remote.
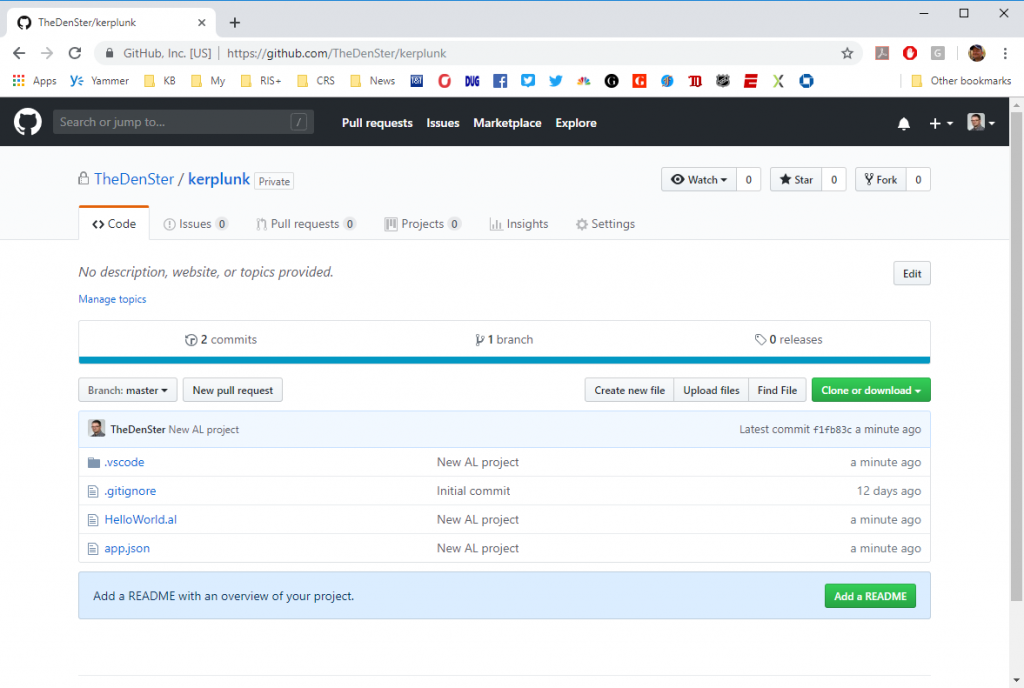
Now check your repo in github and verify that your changes are up there.
Congratulations my friend, are now using source control management 🙂
Update Sep 24, 2018: added YouTube link. As I was writing this post, I was also working on a training video to get started with source code management. You can find it on YouTube here:
Update March 30, 2019 – new screenshots to show current look of VSCode
One of the cool things about the Microsoft Inspire event is that IT. IS. HUUUUGE! One of the most annoying things about Inspire is that it is HUUUGE! It is so easy to get lost among the 10,000 or so attendees that are milling about, going to sessions across a bunch of floors, walking around the immense expo floor with what seems to be thousands upon thousands of vendors peddling their wares.
The best part about this event was that it was in Vegas. Not that I particularly enjoy Vegas, but it is a drive away from my house. This means that I got to leave at a convenient time, drive my own car, and bring a guitar with me so that I can play in my hotel room.
Two of my partners made the trip from Europe, and we had a bunch of meetings scheduled with some potential and existing customers. It is always nice to spend some time with them, we had great food, saw some cool things. I was looking forward to going to the Bruno Mars concert at the big event, but the night in question was hotter than hell, and there was no way I was going to go out in that temperature. Bruno will have to wait to have me in his audience at a later date 🙂
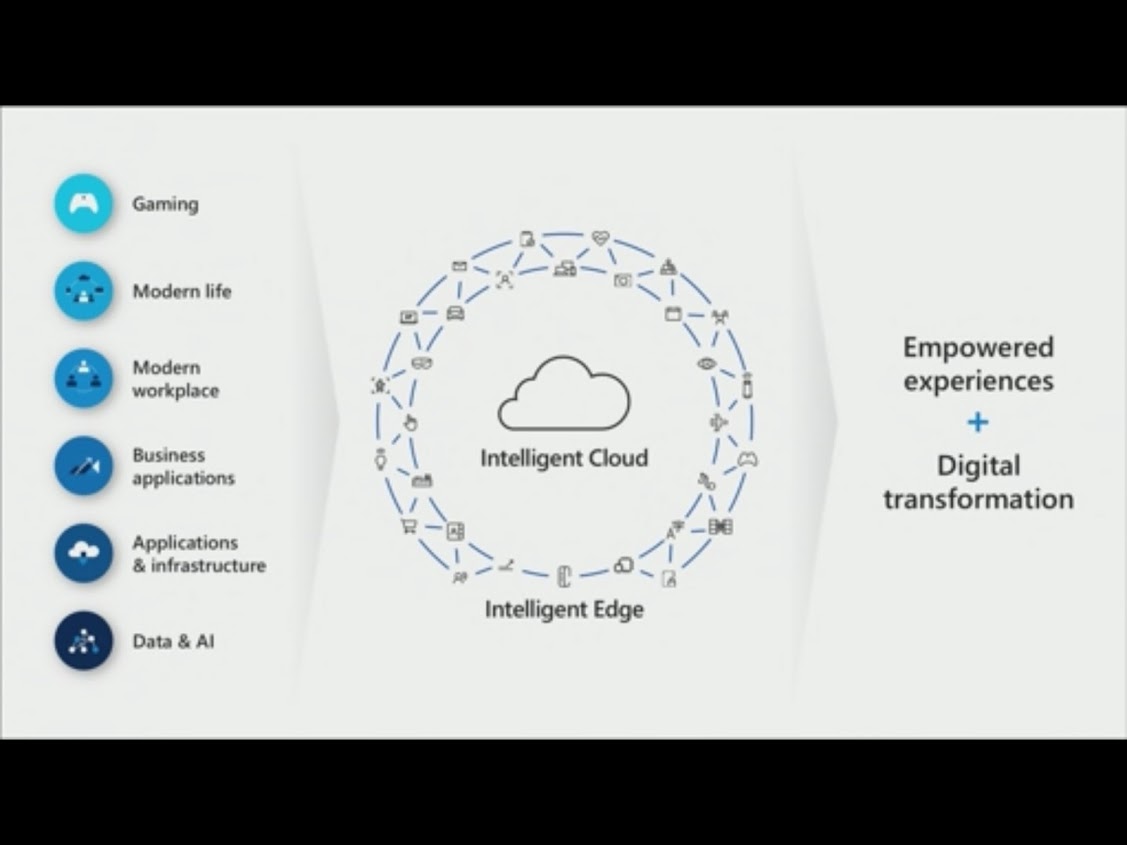
So…. what was the buzz around Inspire this year? For me it was a further crystallization of Microsoft’s digital transformation strategy. The marketing heads have come up with something called ‘Intelligent Edge’ which is a way to categorize everything into a big connected amalgamation of connected technologies. There were many slides about machine learning, AI, a BIG emphasis on Azure. All of this with unlimited scalability in the Microsoft Cloud, which comes with an incremental subscription fee of course.
Microsoft seems to realize that they need the partner channel to do most of the selling for them, so the way they organize that has gone through some further evolving. It’s still very shortly after the event so I haven’t had much time to let this stew and find some good resources. I’m actually not sure if I will have much time for that anyway. I am knee deep in working on hours of new training material that needs to be finished before the next event, so we’ll see if I get to do some research on all of this.
For me, I like to dive a little deeper into specific topics. Inspire is a bit overwhelming for me, and it is an extremely expensive event to boot. We’ve been to Inspire two years in a row, and if we’ll come back next year (which I doubt) we will probably just get a room near the conference and use the event as a means to be in one place with our customers and Microsoft people.
I’m on my way home from a bucket list kind of trip this past week. This post is more than just a travel log, I’ll get to a good link that you will be able to use to get Ready to Go for Business Central. Bear with me and let me tell the story of my trip 🙂
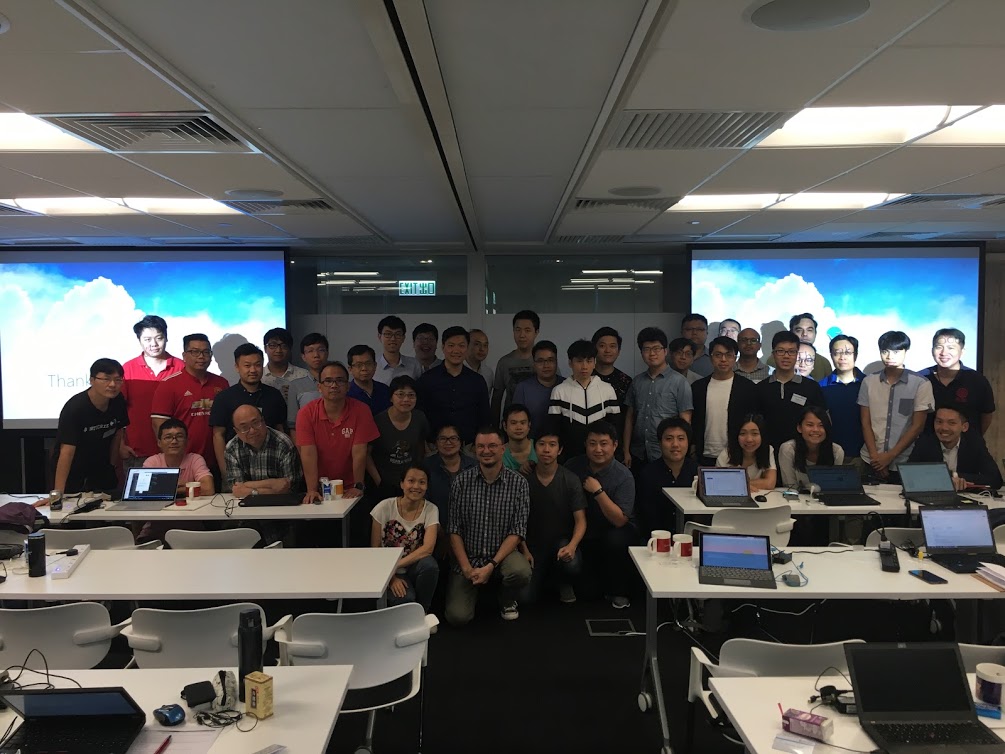
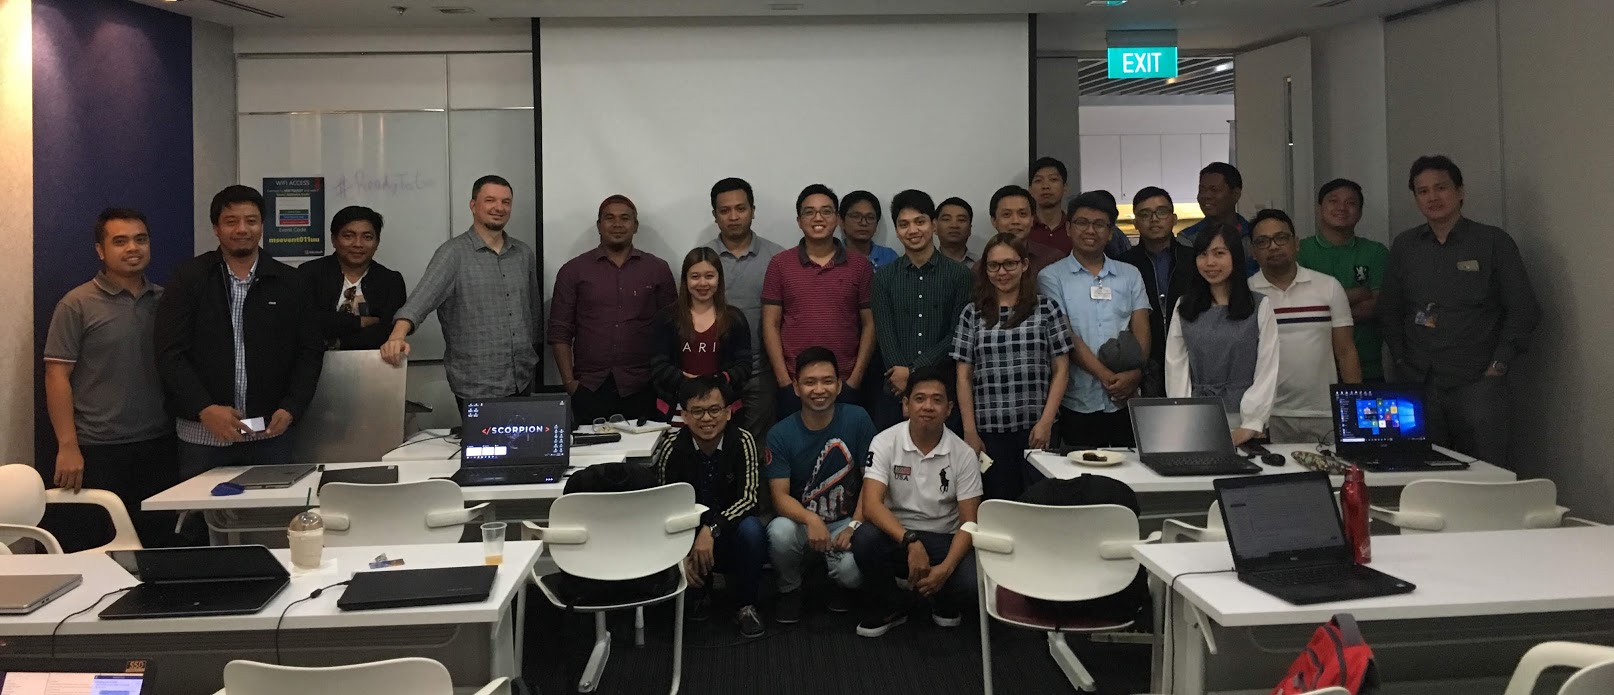
Through my work I’ve had the opportunity to travel pretty much to the opposite side of the globe to teach the CRS workshop for developing extensions for Business Central with VSCode. The first 2 day workshop was in Hong Kong on Monday and Tuesday, and then Thurday and Friday I hosted the same workshop in Manila. To have some time for sightseeing I arrived in Hong Kong on Saturday early morning. My hotel was on Hong Kong Island, and I spent the day mostly walking around the area near the hotel. It was a very long trip, and I had a looooong night sleep to recover from the journey.
On my flight over, I was a little too vigorous trying to clean the keyboard on my laptop, and it stopped working. As I kind of need a keyboard for the workshop, part of my Sunday sightseeing was to roam the city in search of an external keyboard, which fortunately I found. It’s an unusual souvenir, but I am actually typing this on a keyboard with Chinese characters.
Instead of my original plan to take a ferry across the harbor and find some of the famous food places, I stayed around town on the island. There was an awesome dragon boat race, and I took the trolley up to Victoria Peak, which is where I took the picture at the top of this post. It was fantastic to be in Hong Kong, the people were very hospitable, I really hope I get the chance to go back there some day and spend some serious time exploring the area there.
These workshops are part of a program called ‘Ready to Go’, which was created to help the Microsoft partner channel build the skills that are necessary to succeed in the new ecosystem for Business Central. I’ll post something with more details probably in a few days, and go into a little more detail then, but the link that you want to jot down is http://aka.ms/ReadyToGo. On this page, you will find a ton of good content, and even more links to other places with even more content. This link can be your starting point for any information that you might need to succeed.
The workshops were a success, and I’ve received lots of positive feedback. It was a pleasure visiting these two places, and I hope to go back there one day. These are people that are Ready to Go!
Registration for NAV Techdays 2018 is open, and this year is going to be SUPER exciting for me, because I am going to teach an all-day pre-conference workshop! Go to the sessions overview page of the NAV Techdays website to see the details of all of the sessions and the pre-conference workshops. Of course I would LOVE it if you sign up for my workshop, but really you can’t go wrong with any of them.
My workshop is called “A Day in the Life of a Business Central Developer”. I still need to put the material together, but the plan is to cover all aspects of what it means to be a developer for Microsoft Dynamics 365 Business Central. Think about the development environment, how to create an app, how to create multiple apps with dependencies (an extension of another extension), how to connect to web services, how to use source control, and even design patterns and Docker.
I realize that it is a very ambitious agenda, but I am sure that we can fill a whole day with great content. I’m not sure if there will be much time to do any extensive lab work, so I might end up just teaching all day and giving you some things to take home and work on after the workshop is done.
Most importantly – go register for NAV Techdays, it is really THE premium event for our industry. Spend an extra couple of days in Antwerpen for the pre-conference workshops, they are all fantastic and worth every penny.
One of the cool things about my work is that I get to participate in some things very early. This is often really cool, but it also comes with some frustration when things don’t go very smoothly, or when there is little information to work with. One of those things, which I had absolutely NO knowledge of, was signing an app file… I had not a clue what this means, and no clue where to go to get this information.
The page where Microsoft explains how this works can be found here. It looks like a really nice and informative page now, but a few months ago it was confusing as heck, and it was not very helpful to me. At the time, I was working on an app for one of our customers, and one of the steps to get apps into AppSource is to sign the app file before you submit it.
Electronically signing a file is essentially a way to identify the source of the file and certify that the file comes from a known source. The ISV partner that develops an app must register with the signing authorities, and then every time that they release a file, they have to stamp that file with their identifying attributes. The process to do this is to ‘sign’ the file.
I’m not going into the details of how to get this done, the resource in Docs.microsoft is quite good now, so you can read it there. One thing I do want to share is that you should ALWAYS timestamp your signing. If you don’t timestamp the signature, your app will expire the same date as your certificate. If you DO timestamp, the signature will be timestamped with a date that was within the validity of your certification, and your app file will never expire. You do have to keep your certificate valid of course, but at least by timestamping the signature, the files that you sign will not expire.
During the whole process of getting the certificate and the signature, I worked with someone at Microsoft, who helped me get my customer’s app signed, and he also took my feedback to improve the documentation. I noticed something about the documentation that I think should be pointed out.
Documentation for Business Central is now in a new space called ‘docs.microsoft.com‘. In contrast with MSDN, Docs is almost interactive with the community. Maybe you’ve noticed, but each page in Docs has a feedback section. Scroll down on any page in there, and you will see that there is a section where you as a consumer of this information can leave your feedback.
I did this, and to my surprise I got an email. As it happened, the person that was working on the signing page knew my name and knew how to get a hold of me, and we worked together to make the page more informative. It was a coincidence that we knew about each other, but what was no coincidence was that there are actual product group people at Microsoft that are responsible for the documentation. There is a team of documentation people that watch out for issues on Docs, and they pick up issues within days of submission!!
The feedback system links back through GitHub issues, so if you’ve ever submitted something to the AL team, you know that this is pretty direct communication. I am wondering though, if Microsoft will take this a step further, and open up Docs as a public repository where people can make suggested changes. I think yes, but I’m not sure because there’s not really a history of direct collaboration like that. I have good hope though, because the culture at Microsoft is getting more collaborative by the day.
My struggle to get the new translation files right has been real and too long to recount on this blog. When I finally got it right, it felt like it was more of a coincidence than actual skill to finally get it done.
It started with the app submission checklist, where one of the requirements is to “include all translations of countries your extension is supporting”. The app that I was working on was targeted for the US market, so all I needed was a translation file for ‘en-US’. The page on docs that explains translations explained what I needed to do. Or did it?
Turning on the translation feature in the app.json file and replacing all ML captions and such was easy enough. The trouble begins when you run into the details.
As soon as you rebuild the app, VSCode generated the default translation file in a new folder called ‘Translations’, and the translation file will be called “<YourAppname>.g.xlf”. Because the development language is ‘en-US’, this generated translation file is also specified for the ‘en-US’ language.
The translation page on Docs specifies that you need to copy the generated file “to avoid that the file is overwritten next time the extension is built”. Each time that you build the app it will re-create the generated xlf file. What that means is that you need to make a copy of the translation file and use the copy to do your actual translation work.
So I did make that copy, and because I was working on a US only app, I felt I was done with my translation. I had the generated file in my workspace, I had a copy of it for the ‘en-US’ language, I thought I was good to go. Alas, the app submission failed because they could not find any translation file in my app. Something was missing from my translation file.
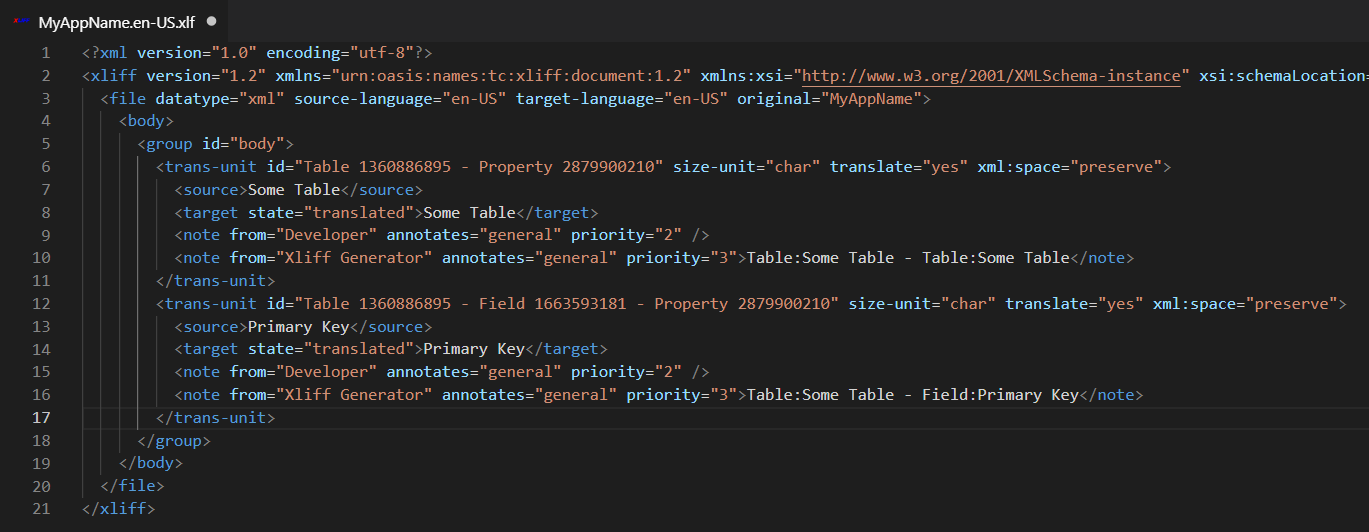
The generated file only has nodes for “source”, which comes from all of your text strings like labels and captions and comments and such. The translation itself is in a node that is NOT included in the generated xlf file, you have to create that. The name of this node is “target”, and this is where the actual translation goes for each source element.
So, I copied and pasted all of the source nodes, made target nodes out of them, and by this time I had a direct line to the validation person at Microsoft, who was willing to hop on a Skype call and look at my workspace. He was also surprised to see that my workspace DID have the translation file, while the app file that I sent to him did not. As it turns out, the target node needs to have an attribute called “state” with a value “translated”.
In order to get the translation file in its proper state, you should use the proper tool, and I found that the Microsoft Multilingual app toolkit editor is the easiest one to work with. It puts the right elements into the xlf file, and when I used that tool, my app file was finally accepted.
My company was commissioned late last year to create some short ‘How Do I’ videos on how to accomplish a bunch of simple technical tasks in Business Central. In total we created about a dozen videos, and they were all published on the “Dynamics 365” channel on YouTube. This channel has a TON of video content about all sorts of topics related to Dynamics 365 in general. Business Central is actually not a main topic in this channel, they are mostly focused on Sales, Marketing, Operations.
Anyway, I wanted to put links to the videos that I recorded in a blog post, so it would be easy to find them. As a result of these videos, we’ve been commissioned to create 30 hours of real training material for Business Central. Yes you read that right… THIRTY HOURS!!!! That’s almost a whole week!!!! Unfortunately, these larger videos will be published in the Dynamics Learning Portal, which is a subscription service inside PartnerSource. You have to have PartnerSource access and also pay extra to be able to access those videos.
I’ve already brought up in an internal meeting that it would be really cool if those videos could be public, and I did not get shot down. I doubt that they will be though, but I will make it a mission to mention this at every step of the way. I’ll keep you posted. On to the videos…
The first one is an easy one, how to add a field in an extension:
Next, how to add a field with a foreign key relation to another table:
Do you want to have a local development environment for Dynamics NAV and Dynamics 365 Business Central, where it is easy to spin up and remove new databases, in whatever version you need? Docker makes it all possible, and this post explains how I was able to get my environment ready for prime time.
One of the most common things that happens in my blogging life is that I will be working on a post about a certain topic, and then as I come near a state where I feel like I can publish, someone else comes along and steals my thunder, and what often happens is that those other people write something much better than what I was working on. It’s demoralizing on one hand, but at the same time great to see so much quality content. Especially when a ton of it comes out on the same day, (as it did today), you ask yourself why am I even trying….
So, having just deleted the content of my attempt at some original Docker content, here are some of the most useful resources for this topic:
You can’t start this with anything other than a vast amount of material by Freddy Kristiansen, who has been working tirelessly on improving this area. He came out with a truckload of material today. You can just go to his blog and look for it yourself, but let me give you links to the most useful ones:
Here’s a new ‘end to end’ document about NAV on Docker. It’s a PDF that tells you everything you need to know, including how to convert your C/AL objects to AL
My journey to finally get Docker to work on my local Hyper-V virtual machine was biased, because I am fortunate enough to work with Arend-Jan Kauffmann. Back in December, he wrote an excellent blog about setting up networking into a local VM and to set up Docker access, where the container runs in the VM, and you can do development directly on the host machine. Thank you AJ for taking some time to look at my computer and helping me set this up.
I now have Docker containers run in multiple versions of Dynamics 365 and NAV, and it is all working seamlessly.
I’m still figuring out how to utilize Hyper-V most efficiently. For instance, I’m not sure yet if I should have multiple VM’s for multiple projects, or just keep it at a single VM with all of my projects. Especially when the version of the VSCode AL Language extension is important I might need to modify my setup. I will be experimenting with this and I’ll share that as I go along.
One thing’s for sure though: with my current working Docker container, this is about as efficient as I’ve ever been in my entire history as a developer.